comelit intercom manual
Welcome to the Comelit Intercom manual‚ your guide to understanding and utilizing cutting-edge communication systems. Comelit‚ a leader in intercom solutions‚ offers innovative audio and video systems designed for residential and commercial settings. This manual provides essential insights for installation‚ configuration‚ and operation.
What is Comelit Intercom?

Comelit Intercom is a cutting-edge communication system designed for seamless audio and video connectivity. It offers a range of solutions tailored for residential and commercial environments‚ ensuring high-quality interaction between users. Comelit systems integrate advanced features like privacy mode‚ SMS command functionality‚ and compatibility with home automation systems. Known for their reliability and user-friendly design‚ these intercoms are widely used globally‚ with a strong presence in regions like Singapore‚ where they are installed in numerous private condominiums. Comelit intercoms support both wired and wireless configurations‚ catering to diverse installation needs. Their systems are also compatible with security and access control technologies‚ enhancing overall property safety. Whether for apartment complexes or office buildings‚ Comelit Intercom delivers efficient communication solutions‚ ensuring clarity and security in every interaction. This manual will guide you through the installation‚ configuration‚ and operation of these systems‚ helping you maximize their potential for a secure and connected environment.

Importance of the Manual
This manual is an essential resource for understanding and optimizing the use of your Comelit Intercom system. It provides detailed guidance on installation‚ configuration‚ and troubleshooting‚ ensuring a smooth setup process. The manual also covers advanced features such as privacy mode‚ SMS command setup‚ and integration with security systems‚ helping you maximize the system’s functionality. Whether you’re a homeowner or a building manager‚ this guide offers step-by-step instructions to address common issues and maintain optimal performance. By following the manual‚ you can ensure your intercom system operates securely and efficiently‚ providing reliable communication and enhancing property safety. This comprehensive guide is tailored to meet the needs of both technical and non-technical users‚ making it an invaluable tool for anyone working with Comelit Intercom systems.
Brief History of Comelit
Comelit‚ an Italian company founded in 1956‚ has established itself as a global leader in designing and manufacturing intercom systems‚ access control‚ and home automation solutions. With over six decades of experience‚ Comelit has evolved from a small Italian firm to a renowned international brand‚ trusted for its innovative and reliable communication systems. The company has expanded its presence worldwide‚ with significant installations in countries like Singapore‚ where its systems are deployed in over 100 private condominiums‚ and the United States‚ where it collaborates with leading technology providers. Comelit’s commitment to innovation and quality has led to the development of cutting-edge products‚ including video entry systems‚ IP intercoms‚ and integrated security solutions. Its partnership with companies like Latch further underscores its influence in the smart building and access control markets. Comelit’s history reflects a dedication to advancing communication and security technologies‚ making it a preferred choice for residential and commercial properties globally.

Installation Guide
Welcome to the Comelit Intercom installation guide. This section provides step-by-step instructions‚ system requirements‚ and wiring diagrams to ensure a smooth setup. Follow the manual carefully to configure your intercom system efficiently and effectively.
System Requirements
To ensure optimal performance of your Comelit Intercom system‚ certain requirements must be met. The system is compatible with 2-wire video entry systems and supports connection to remote color cameras. A stable power supply of 12V DC is necessary for proper functioning. For network integration‚ an Ethernet connection or Wi-Fi compatibility is required‚ depending on the model. Ensure your network supports the specified bandwidth for video and audio transmission. Additionally‚ compatibility with Comelit Building kits and integration with access control systems is essential. The system works seamlessly with Comelit’s ViP platform and compatible software. Always refer to the wiring diagrams provided in the manual for correct installation. Ensure all devices are updated to the latest firmware for enhanced security and functionality. For detailed specifications‚ consult the product manual or contact Comelit support. Proper system configuration ensures reliable operation and maximizes the benefits of your intercom system.
Wiring Diagrams
Wiring diagrams are essential for the proper installation and configuration of your Comelit Intercom system. These diagrams provide a visual representation of the connections required between components‚ ensuring a seamless setup process. The manual includes detailed wiring diagrams specific to 2-wire video entry systems‚ compatible with Comelit Building kits. For instance‚ the 1621VC audio module requires precise wiring to connect to a remote color PAL camera‚ as outlined in the diagrams. Additionally‚ the manual offers product comparison tables to help you identify the correct wiring configuration for your specific system. Always refer to these diagrams to avoid errors during installation. The wiring diagrams are complemented by full instructions‚ ensuring clarity and accuracy. By following the provided wiring guides‚ you can ensure reliable communication and video transmission. Proper wiring is crucial for maximizing system performance and preventing potential issues. Consult the wiring diagrams in the manual for a successful installation.
Step-by-Step Installation
Installing your Comelit Intercom system requires careful planning and execution. Begin by planning the layout‚ ensuring all units are strategically placed for optimal performance. Next‚ mount the intercom units securely‚ following the manufacturer’s guidelines. After mounting‚ proceed with wiring‚ adhering strictly to the provided wiring diagrams to avoid errors. This step is crucial for maintaining reliable communication and preventing future issues.
Once the wiring is complete‚ configure the network settings to integrate the intercom with other devices or security systems. This may involve setting IP addresses or connecting to existing networks. Finally‚ test the system thoroughly to ensure all features are functioning correctly‚ including audio‚ video‚ and any integrated security features. If issues arise during installation‚ refer to the troubleshooting section or consult the manual for guidance. Proper installation ensures a seamless and efficient communication experience with your Comelit Intercom system.

System Configuration
Configuring your Comelit Intercom system involves setting up audio-video preferences‚ network settings‚ and integrating with security systems. Use the manual to guide you through optimizing performance and ensuring compatibility with your existing infrastructure.
- Adjust audio and video settings for clarity.
- Set up network parameters for seamless connectivity.
- Integrate with security systems for enhanced functionality.
Audio and Video Setup
Properly configuring the audio and video settings is essential for optimal performance of your Comelit Intercom system. Start by connecting the audio module to the main unit‚ ensuring all wires are securely fastened. For video setup‚ connect the camera to the monitor using the provided RCA or HDMI cables‚ depending on your system type. Refer to the wiring diagrams in the manual for precise connections.
Once connected‚ access the system menu via the monitor or remote control. Navigate to the audio/video settings and adjust the volume‚ brightness‚ and contrast to your preference. Ensure the camera is positioned correctly to capture clear video footage. Test the intercom by making a call between internal units to verify audio clarity and video synchronization.
If using a 2-wire system‚ ensure proper synchronization between audio and video signals to avoid delays. For advanced configurations‚ consult the manual for SMS command setup to enable remote monitoring. Regularly check camera angles and lighting conditions to maintain high-quality video feed. By following these steps‚ you can enjoy seamless communication and surveillance through your Comelit Intercom system.
Network Configuration
Configuring the network settings for your Comelit Intercom system ensures seamless communication and integration with other devices. Begin by connecting the intercom to your local network using an Ethernet cable or Wi-Fi‚ depending on the model. Assign a static IP address to the intercom device to maintain consistent connectivity. Refer to your router’s settings to enable port forwarding‚ which allows remote access to the intercom system.
For advanced setups‚ configure the intercom to work with your existing security or smart home systems. Enable encryption protocols to secure data transmission and protect against unauthorized access. Test the network connection by pinging the intercom’s IP address or using the Comelit software to verify communication. Troubleshoot any issues by checking physical connections‚ restarting devices‚ or consulting the manual for specific guidelines.
Regularly update network settings to adapt to changes in your local network environment. Ensure all devices are on the same subnet and that firewalls are configured to allow necessary ports. By properly configuring your network‚ you can enjoy reliable performance and enhanced functionality from your Comelit Intercom system. Always refer to the manual for model-specific instructions.
Integration with Security Systems
Comelit Intercom systems are designed to integrate seamlessly with various security systems‚ enhancing overall property protection. By connecting your intercom to access control systems‚ you can manage entry points efficiently. For example‚ integrate with smart locks or biometric scanners to grant access only to authorized individuals. Additionally‚ Comelit systems can be linked to surveillance cameras‚ allowing live video monitoring directly through the intercom interface.
The intercom also works with alarm systems‚ enabling real-time alerts during suspicious activities. Use SMS command setups to receive notifications or trigger responses remotely. Many users pair Comelit intercoms with systems like Latch‚ creating a unified security solution. Ensure compatibility by checking the manual for specific integration protocols and software requirements.
Configuration typically involves connecting systems via API or IP integration. This setup allows central control‚ linking video feeds‚ access logs‚ and alarm triggers. Always consult the manual for detailed steps tailored to your system. Proper integration enhances security and streamlines monitoring‚ ensuring a safer environment.

Operation and Functionality
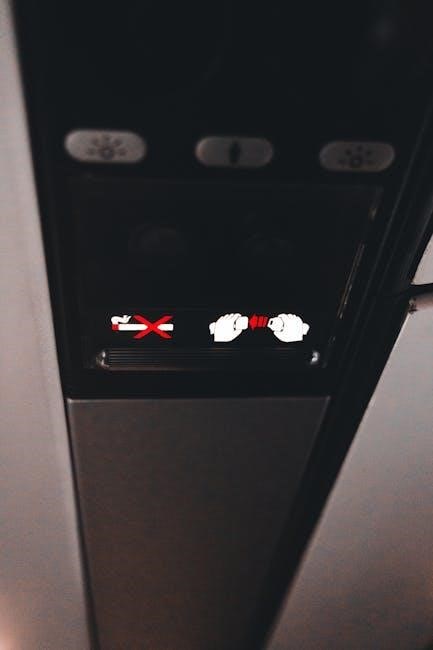
Comelit Intercom offers advanced features for seamless communication. Make internal calls‚ activate privacy mode to silence ring tones‚ and send SMS commands for remote control. The system also supports video monitoring‚ ensuring comprehensive functionality for user convenience and security.
Making Internal Calls
Making internal calls with your Comelit Intercom system is straightforward and efficient. To initiate a call‚ simply select the desired internal unit from the apartment monitor or remote app interface. The system supports both audio and video calls‚ ensuring clear communication. For added convenience‚ users can also dial directly using the keypad‚ entering the specific extension or apartment number.
Once a call is placed‚ the recipient’s monitor will ring and display a video preview if enabled. The caller can choose to mute their microphone or switch to privacy mode to silence notifications. Internal calls can also be made between multiple units simultaneously‚ making it ideal for announcements or group communication.
The Comelit Intercom system ensures a seamless and secure internal calling experience‚ with features like call waiting and do-not-disturb options. For further customization‚ users can program speed-dial buttons or set up call forwarding to external numbers. This functionality enhances connectivity within residential or commercial settings‚ making it a reliable solution for daily communication needs.
Refer to the manual for detailed instructions on advanced features like SMS command integration‚ which allows users to control call settings remotely. With Comelit‚ internal communication is both intuitive and powerful‚ designed to meet the demands of modern living and working environments.
Privacy Mode
Privacy Mode on your Comelit Intercom system allows users to silence incoming call notifications‚ ensuring uninterrupted peace in their living or working spaces. This feature is particularly useful in residential settings where privacy is paramount. When enabled‚ the system mutes the ringtone and visual alerts‚ preventing disturbances during meetings‚ rest periods‚ or family time.
Activating Privacy Mode is simple: access the settings menu on your apartment monitor or via the remote app‚ then toggle the Privacy Mode option. Users can also schedule Privacy Mode to activate automatically during specific hours‚ such as overnight or during business meetings.
While Privacy Mode silences notifications‚ it does not disconnect the system. Users can still receive calls and messages; however‚ they will not be alerted audibly or visually. This ensures that important communications are not missed while maintaining a quiet environment.
The Comelit Intercom system balances convenience and privacy seamlessly‚ offering customizable settings to suit individual preferences. For more detailed instructions on configuring Privacy Mode‚ refer to the user manual or contact customer support.
SMS Command Setup

The SMS Command Setup feature on your Comelit Intercom system allows users to send text messages to control specific functions remotely. This feature is particularly useful for managing access‚ monitoring‚ and system adjustments without physical interaction.
By sending predefined SMS commands to your Comelit 4G GSM Intercom‚ you can perform actions such as unlocking doors‚ checking system status‚ or enabling privacy mode. For example‚ typing “OPEN” or “UNLOCK” can grant access to visitors‚ while “STATUS” provides real-time updates on the system’s operation.
These commands are easy to configure and can be customized to meet individual needs. The system supports multiple users‚ allowing property managers or homeowners to delegate access securely.
For a full list of supported SMS commands and setup instructions‚ refer to the user manual or contact Comelit support. This feature enhances convenience and remote monitoring‚ making it a powerful tool for modern intercom systems.

Maintenance and Troubleshooting
Regular maintenance ensures optimal performance. Check for firmware updates‚ clean equipment‚ and verify all connections. For any issues‚ consult the troubleshooting guide or contact Comelit support for professional assistance.
Regular Maintenance
Regular maintenance is essential to ensure the optimal performance and longevity of your Comelit Intercom system. Start by inspecting the wiring and connections to prevent issues caused by wear and tear. Clean the camera lenses and monitors regularly to maintain video clarity. Check for software updates and install them promptly to benefit from the latest features and security patches. Additionally‚ test the intercom’s audio and video functionality periodically to identify and address any potential problems early. For detailed instructions‚ refer to the specific maintenance guidelines provided in this manual. Regular upkeep not only enhances system reliability but also ensures uninterrupted communication and security in your property.
Common Issues
While Comelit intercom systems are reliable‚ users may encounter occasional issues. One common problem is connectivity loss‚ often due to faulty wiring or poor network configuration. Another issue is audio or video quality degradation‚ which can result from interference or outdated software. Privacy mode may fail to activate‚ allowing unwanted calls‚ and SMS commands might not function properly if the system is not configured correctly. Additionally‚ some users report difficulty integrating the intercom with security systems‚ leading to monitoring gaps. Regular software updates and proper installation can prevent many of these problems. Always refer to the manual for troubleshooting steps or contact support for assistance. Ensuring your system is up-to-date and correctly configured is key to maintaining optimal functionality and security.
Software Updates
Regular software updates are essential to ensure your Comelit intercom system operates at peak performance. Updates often include bug fixes‚ security enhancements‚ and new features to improve functionality. To update your system‚ access the settings menu via the user interface and select the “Software Update” option. The system will automatically check for available updates and guide you through the installation process. Always ensure your device is connected to a stable internet connection during updates to avoid interruptions. For advanced systems‚ updates may also be performed remotely by authorized personnel. Keeping your software up-to-date is crucial for maintaining compatibility with integrated security systems and ensuring optimal performance. Refer to your Comelit intercom manual for detailed step-by-step instructions tailored to your specific model. Regular updates help safeguard your system against potential vulnerabilities and ensure you benefit from the latest innovations in intercom technology.

Security Features
Comelit intercom systems offer robust security features‚ including advanced access control‚ data encryption‚ and real-time monitoring. These features ensure secure communication and protect against unauthorized access‚ providing peace of mind for users in residential and commercial settings.
Access Control
Comelit Intercom systems offer advanced access control features‚ ensuring secure entry management for residential and commercial settings. These systems integrate seamlessly with electronic locks‚ keycard readers‚ and biometric scanners‚ providing robust security solutions. With Comelit‚ you can grant or restrict access to specific areas‚ monitor entry points‚ and maintain a record of all access events.
- Keycard and biometric integration for enhanced security.
- Customizable access permissions for different users.
- Real-time monitoring of entry points.
- Compatibility with existing security infrastructure.
Comelit’s access control solutions are designed to streamline security management while ensuring maximum protection. Whether it’s for a single building or a multi-unit complex‚ Comelit systems provide reliable and efficient access control‚ enhancing overall security and user convenience.
Data Encryption
Data encryption is a critical security feature in Comelit Intercom systems‚ ensuring that all communications remain secure and protected from unauthorized access. Comelit employs advanced encryption protocols‚ such as AES (Advanced Encryption Standard)‚ to safeguard audio‚ video‚ and data transmissions. This ensures that sensitive information‚ like access codes or video feeds‚ cannot be intercepted or exploited by malicious actors.
- AES encryption for secure data transmission.
- Protection of audio and video communications.
- Encrypted access codes and user credentials.
- Secure communication channels for all system operations.
Comelit’s encryption capabilities are designed to provide peace of mind for users‚ knowing their interactions and data are shielded from potential breaches. By integrating robust encryption into their intercom systems‚ Comelit ensures a high level of security‚ making their solutions trusted for both residential and commercial applications.
Monitoring
Monitoring is a vital feature of Comelit Intercom systems‚ enabling users to maintain constant vigilance over their premises. The system allows for real-time surveillance through live video feeds‚ ensuring that users can monitor activities at their doorstep or within their property. This feature is particularly useful for enhancing security and providing peace of mind.
- Real-time video monitoring for added security.
- Live feeds from cameras connected to the intercom system.
- Remote monitoring capabilities via compatible devices.
- Customizable alerts for motion detection or unauthorized access.
Comelit’s monitoring capabilities integrate seamlessly with other security features‚ such as access control and data encryption‚ to create a comprehensive security solution. Users can easily keep track of who enters their property and respond accordingly‚ making it an essential tool for both residential and commercial settings.