
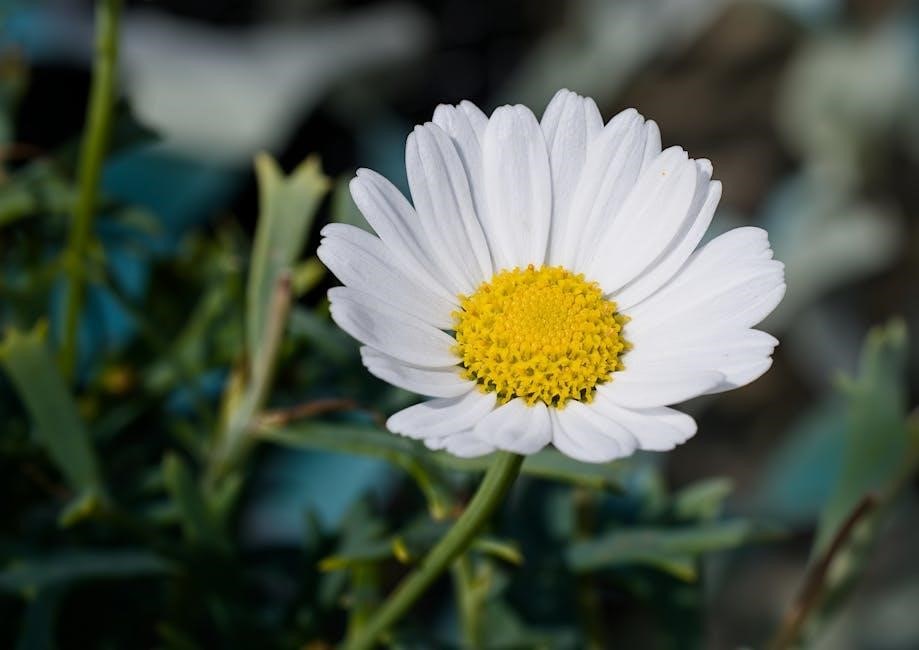
Origami flowers are a timeless craft rooted in tradition, offering a creative outlet. With PDF templates and step-by-step tutorials, anyone can master beautiful designs like the kusudama and 2-unit flower, bringing elegance to any space.
1.1. History and Cultural Significance of Origami Flowers
Origami flowers trace their roots to ancient Japanese traditions, where paper folding symbolized artistry and patience. Historically, origami was used in ceremonies and as gifts, embodying thoughts and emotions. The kusudama flower, a traditional design, reflects this cultural heritage. Over time, origami evolved globally, blending traditional techniques with modern creativity. Today, origami flowers are cherished for their beauty and symbolic meaning, often used in decorations and gifts. Their cultural significance lies in their ability to connect people across generations, preserving a delicate balance between tradition and innovation. With resources like PDF templates and tutorials, this art form remains accessible, inspiring both beginners and seasoned artists to create something meaningful.
1.2. Benefits of Making Origami Flowers
Making origami flowers offers numerous benefits, combining artistry with mindfulness. The process fosters patience and focus, serving as a therapeutic activity. It enhances fine motor skills and hand-eye coordination, making it enjoyable for all ages. Origami also stimulates creativity and problem-solving abilities, encouraging innovation in design; The satisfaction of crafting something beautiful provides a sense of accomplishment. Additionally, origami flowers are eco-friendly and cost-effective, perfect for DIY projects or gifts. They can be used to create stunning decorations, such as flower walls or bouquets, adding a personal touch to any occasion. With resources like PDF templates and tutorials, beginners can easily learn and master various designs, making origami flowers a rewarding and accessible hobby for everyone.
Essential Materials and Tools
Crafting origami flowers requires specific materials. Start with square paper, scissors, and a bone folder. A ruler and glue are optional. Use PDF templates for precision and variety in designs. Essential tools ensure professional results.
2.1. Types of Paper Recommended for Origami Flowers
Choosing the right paper is crucial for creating origami flowers. Popular options include kami (traditional origami paper), washi (Japanese paper), and chiyogami (colorful patterned paper). These papers are lightweight, durable, and fold well. For more intricate designs, consider cardstock or foil paper for added texture and dimension. Many PDF templates specify compatible paper types, ensuring optimal results. When selecting paper, consider the desired size, color, and finish of your flowers. Proper paper choice enhances the overall appearance and longevity of your origami creations, making each piece a stunning work of art.
2.2; Basic Tools Needed for Origami
To create origami flowers, you’ll need a few essential tools. A bone folder or similar blunt tool helps make sharp creases in the paper, ensuring precise folds. A ruler or straightedge is useful for measuring and aligning edges. Scissors are necessary for cutting paper to the desired size. A cutting mat or protective surface prevents damage while cutting. For intricate details, tweezers can help shape small petals. Many PDF templates include guides for tools and materials, making it easier to prepare. These basic tools are versatile and will help you achieve professional-looking results in your origami projects. Proper tools enhance accuracy and make folding more enjoyable, allowing you to focus on the artistic aspects of creating beautiful flowers.
2.3. Tips for Choosing the Right Materials
Selecting the right materials is crucial for creating beautiful origami flowers. Start with high-quality paper, such as washi or kami, which offers durability and a vibrant finish. For intricate designs, chiyogami paper with patterns adds visual appeal. Heavier paper, like cardstock, is ideal for large flowers or 3D arrangements. Always choose paper that matches your skill level—thinner sheets for beginners and thicker for advanced folds. Consider the occasion; metallic or textured papers can elevate your flowers for special events. SVG and PDF templates often specify paper weights and sizes, ensuring a perfect fit. Finally, store your materials in a dry, flat space to prevent damage. The right paper and tools will enhance your folding experience and result in stunning origami flowers.
Step-by-Step Instructions for Making Origami Flowers
Begin with a square base, folding valley lines to create the foundation. Follow step-by-step tutorials or PDF guides to craft petals, centers, and finishing touches for stunning results.
3.1. Starting with a Square Base
Begin by folding a 1.5×1.5 inch square paper into a square base, ensuring all edges are aligned. Create valley folds along the diagonals and midlines to form a foundation. Fold the corners to the center, making precise creases. This step is crucial for symmetry and balance in your origami flower. Use a ruler for accuracy and ensure the paper is perfectly square before starting. Properly executed folds here will simplify subsequent steps, such as petal formation and center detailing. This method works for both simple and complex designs, like the kusudama and 2-unit flower. Follow the step-by-step PDF guides for visual clarity and mastering the technique.
3.2. Folding the Initial Petals
Once the square base is prepared, focus on creating the initial petals. Begin by making valley folds along the midlines and corners to form triangular shapes. Fold the top and bottom edges inward to meet at the center, creating a layered effect. Next, fold the sides similarly, ensuring symmetry. These folds will shape the base of the petals. For intricate designs, like the kusudama, repeat this process for multiple layers. Use the step-by-step PDF guides to ensure accuracy. Properly folded petals will form the foundation for more complex details later. This step requires patience and precision to achieve a natural, blooming appearance. The initial petals will eventually unfurl into the flower’s outer layers, making this stage crucial for the final design.
3.3. Creating the Flower Center
Creating the flower center is a delicate yet essential step. Begin by folding the base inward to form a small, compact core. Use valley folds to bring the corners to the center, ensuring symmetry. For designs like the kusudama, this step is repeated for each petal layer. According to origami flower instructions PDF, precise folding ensures the center holds the petals securely. Gently press the folds to create a defined shape. The center should be tight but not overly compressed, allowing the petals to bloom naturally. Use diagrams or step-by-step guides to maintain accuracy. This step requires patience and a steady hand, as the center determines the flower’s overall appearance. A well-crafted center will support the petals and give the flower its signature elegance and structure.
3.4. Shaping the Outer Petals
Shaping the outer petals is where your origami flower begins to take its final form. Gently pull each petal outward, using valley folds to create a natural curve. According to origami flower instructions PDF, this step requires precision to ensure uniformity. Lightly press the folds to define the petal edges, making sure they align symmetrically. For designs like the kusudama, layering petals adds depth. Use a bone folder or similar tool to sharpen creases if needed. The goal is to create soft, lifelike curves that mimic real petals. Once all petals are shaped, adjust their angles for a balanced look. This step is crucial for achieving a realistic and visually appealing flower. Refer to diagrams in your guide for reference, and experiment with layering for added dimension.
3.5. Adding the Finishing Touches
The final step involves refining your origami flower for a polished look. Adjust any uneven petals and ensure symmetry. For added realism, lightly curl the petal edges using tweezers or your fingers. According to origami flower instructions PDF, securing the base with a small dot of glue prevents petals from unfolding. For extra detail, apply paint or markers to mimic natural color variations. Some tutorials suggest adding a central stamen or bead for authenticity. To protect your creation, apply a light coat of spray varnish. These finishing touches enhance the flower’s appearance and durability. Refer to diagrams in your guide for precise techniques, and explore creative variations like layering or adding textured elements. With patience, your origami flower will be a stunning, professional-looking piece ready for display or gifting.

Popular Origami Flower Designs
Explore popular origami flower designs like the kusudama and 2-unit flower, each detailed in origami flower instructions PDF for easy creation and customization.
- Kusudama: Intricate layers for a realistic look.
- 2-Unit: Simple yet elegant petals.
4.1. Kusudama Flower
The kusudama flower is a traditional Japanese origami design that resembles a ball composed of multiple small flowers. It is often used in decorations and gifts, symbolizing unity and beauty.
To create a kusudama flower, start with a square paper, typically folded into smaller squares. The process involves valley folds and precise creases to shape individual petals, which are then assembled into a spherical shape. Each petal is folded and arranged to form a realistic floral appearance.
Instructions for the kusudama flower are widely available in origami flower instructions PDF formats, offering detailed step-by-step guides. These resources often include diagrams and tips for mastering the technique, making it accessible for both beginners and experienced crafters alike.
4.2. 2-Unit Flower
The 2-Unit Flower is a simple yet elegant origami design, perfect for beginners. It involves folding two identical units that are then combined to form a realistic flower shape. This design is great for those new to origami, as it requires basic folds and minimal materials.
The process begins with a square paper, folded into smaller sections to create the petals. Valley folds are essential for shaping the flower’s natural curves. Once both units are complete, they are attached at the base to form the final flower. This technique is widely shared in origami flower instructions PDF guides, offering clear diagrams and step-by-step directions.
The 2-Unit Flower is versatile and can be used in various DIY projects, such as decorations or gifts, making it a popular choice among origami enthusiasts.
4.3. Waterbomb Base Flower
The Waterbomb Base Flower is a popular origami design that utilizes the waterbomb fold as its foundation. This fold creates a sturdy base that mimics the shape of a waterbomb, allowing for the formation of intricate petal structures. The waterbomb base is a versatile starting point, enabling the creation of realistic and layered flower designs.
This method is ideal for crafting flowers with a natural, 3D appearance. By folding the paper into a waterbomb shape, you can easily transform it into a blooming flower with defined petals. The process involves folding a square paper into smaller triangles, creating layers that resemble real flower petals. The waterbomb base flower is a favorite among origami enthusiasts due to its simplicity and the beautiful results it produces.
Tutorials and PDF guides often feature this design, providing step-by-step instructions for mastering the technique. It’s perfect for both beginners and experienced crafters looking to create elegant floral designs.
4.4. Pop-Up Geometric Flower
The Pop-Up Geometric Flower is a striking origami design that combines precision folding with artistic creativity. This flower features intricate geometric patterns and symmetrical shapes, making it a standout piece in any origami collection. The design often involves folding techniques that create a 3D effect, giving the flower a dynamic, pop-up appearance.
Created by folding a square paper into angular shapes, the Pop-Up Geometric Flower emphasizes clean lines and mathematical precision. Its unique structure allows it to “pop up” from the surface, adding an interactive element to the design. This style is inspired by modern origami artists like Masahiro Chatani and Keiko, who popularized geometric folding techniques.
Tutorials and SVG/PDF templates are widely available, offering step-by-step guides to master this design. Perfect for crafters who enjoy precision and modern aesthetics, the Pop-Up Geometric Flower is a rewarding project for both beginners and experienced origami enthusiasts.

Advanced Techniques for Origami Flowers
Explore advanced origami techniques for creating intricate flowers, including layering, texturing, and incorporating SVG/PDF templates from expert sources to enhance beauty and complexity.
5.1. Layering Multiple Flowers
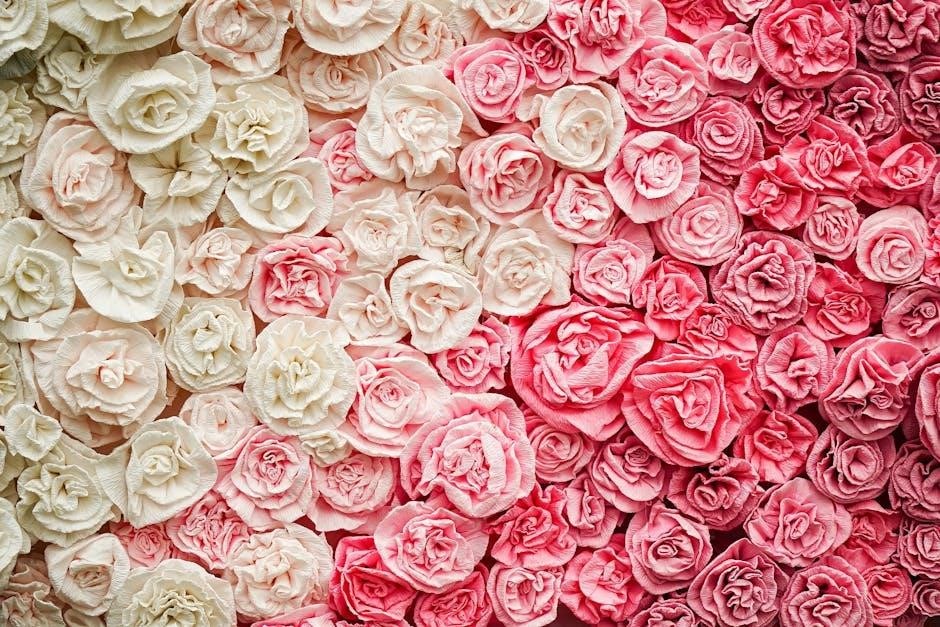
Layering multiple flowers is an advanced technique that adds depth and visual appeal to your arrangements. By following detailed PDF tutorials, you can learn how to stack petals and combine different flower designs seamlessly. This method allows for the creation of intricate bouquets or decorative backdrops, perfect for events like weddings or baby showers. The process involves carefully aligning each flower and securing them with subtle folds or adhesives. With practice, you can achieve stunning, professional-looking arrangements. Many origami flower instructions include tips on selecting complementary colors and patterns to enhance the layered effect. Experiment with various combinations to find your unique style and elevate your origami creations to new heights.
5.2. Introducing Color and Patterns

Adding color and patterns to origami flowers enhances their beauty and personalization. Using PDF templates, you can explore various designs, from vibrant gradients to intricate textures. Many tutorials offer tips on selecting paper with pre-printed patterns or applying colors post-folding. Techniques like layering colored petals or incorporating metallic finishes can elevate your creations. DIY guides also suggest experimenting with painted or printed designs before folding. This allows for unique, personalized touches that make each flower distinct. By combining different hues and motifs, you can create stunning arrangements that reflect your style. Whether using pre-designed templates or crafting custom patterns, the possibilities for artistic expression are endless, making your origami flowers truly one-of-a-kind pieces of art.
5.3. Adding Dimension with Textures
Enhancing origami flowers with textures adds depth and realism. Techniques include using textured paper, embossing tools, or layering materials like fabric. PDF templates often highlight textured designs, while DIY tutorials demonstrate how to create dimensional effects using tools like bone folders or styluses. folding techniques can mimic natural petal textures, while metallic or glitter papers add luxury. Layering petals with varying textures creates a 3D effect, making flowers more lifelike. Experimenting with materials like lace or crepe paper further enhances texture. These methods allow artists to craft intricate, visually striking designs that stand out. By incorporating texture, origami flowers become not just decorative but also tactilely engaging, offering a more immersive creative experience.
5.4. Using SVG and PDF Templates
SVG and PDF templates are invaluable tools for creating intricate origami flowers. These files provide precise cutting and folding guides, ensuring accuracy for complex designs. SVG templates are scalable, making them ideal for custom sizes, while PDFs are perfect for printing and tracing. Many artists offer downloadable Premium origami diagrams and eBooks featuring detailed step-by-step instructions. Platforms like ArtsyNFlowery provide SVG and PDF templates for various flower designs, from simple to elaborate. These resources are especially helpful for beginners, as they eliminate guesswork. Advanced crafters can also use SVG editors to customize designs. Whether for personal projects or professional use, these templates streamline the creative process, allowing for flawless execution of origami flower arrangements and decorative pieces. They are a must-have for anyone aiming to master the art of paper floristry.

Resources and Tutorials
Discover free printable PDF templates and DIY video tutorials for origami flowers. Explore premium origami diagrams and eBooks offering step-by-step guides. Platforms like ArtsyNFlowery provide SVG and PDF templates for intricate designs.
6.1. Free Printable PDF Templates
Free printable PDF templates are an excellent resource for creating origami flowers. These templates provide detailed diagrams and step-by-step instructions, making it easy to craft intricate designs. Many websites offer origami flower templates in PDF format, including designs for roses, lilies, and more. Some templates include SVG files for precision cutting, while others offer scrapbook-sized patterns for DIY projects. Platforms like ArtsyNFlowery and other craft sites provide downloadable templates perfect for flower walls, backdrops, and gift decorations. These templates are ideal for both beginners and experienced crafters, ensuring everyone can enjoy the art of origami. With these resources, you can easily print and fold your way to beautiful paper flowers.
6.2. DIY Video Tutorials
DIY video tutorials are an invaluable resource for mastering origami flowers. These videos provide step-by-step visual guidance, making it easier to understand complex folds and techniques. Platforms like YouTube and crafting websites offer a wide range of tutorials, from basic designs like the 2-unit flower to intricate models such as the kusudama. Many tutorials include close-up shots and slow-motion demonstrations, ensuring learners can follow along with precision. Additionally, some creators offer voiceover instructions and PDF templates to complement the videos. These resources are perfect for both beginners and experienced crafters looking to refine their skills. By combining visual and written guidance, DIY video tutorials make the process of creating origami flowers enjoyable and accessible for everyone.
6.3. Premium Origami Diagrams and eBooks
Premium origami diagrams and eBooks offer detailed, high-quality instructions for creating intricate flower designs. These resources often include step-by-step visual guides, SVG templates, and PDF patterns for precise folding. Many premium materials focus on advanced techniques, such as layering petals or creating 3D effects, making them ideal for experienced crafters. Platforms like Etsy and specialized crafting websites feature premium content from skilled artists, ensuring professional-grade results. For example, creators like ArtsyNFlowery provide comprehensive eBooks with exclusive designs and tips for customizing flowers. These resources are a valuable investment for those seeking to master complex origami flower designs and explore unique, elaborate patterns beyond basic tutorials.
Embark on the creative journey of origami flowers, exploring PDF templates and tutorials. Each fold brings satisfaction and artistry, encouraging you to experiment and share your unique creations.
7.1. Final Tips for Mastery
Achieving mastery in origami flowers requires patience and practice. Start with simple designs, such as the 2-unit flower, and gradually move to complex patterns like the kusudama. Utilize free printable PDF templates to guide your folds and ensure precision. Pay attention to valley folds and corner details, as they form the foundation of intricate designs. Experiment with different paper types and colors to enhance your creations. For visual learners, DIY video tutorials offer step-by-step demonstrations, making it easier to grasp advanced techniques. Don’t hesitate to customize templates or blend designs to create unique pieces. Remember, every fold brings you closer to crafting stunning origami flowers that reflect your personal style and creativity.
7.2. Encouragement to Experiment
Embrace creativity and don’t be afraid to experiment with origami flowers. Try mixing patterns, colors, and textures to create unique designs. Explore SVG and PDF templates for inspiration or to craft intricate shapes. Combine different folding techniques to invent your own styles, such as blending kusudama and geometric elements. If a design doesn’t turn out as expected, see it as an opportunity to learn and refine your approach. DIY video tutorials and premium diagrams can provide fresh ideas to spark your creativity. Remember, origami is not just about following instructions—it’s an art form. Let your imagination guide you, and enjoy the process of transforming simple paper into breathtaking floral masterpieces.