
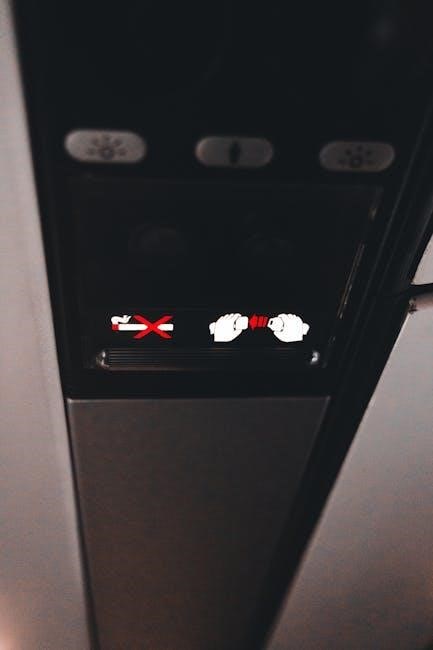
this alert/warning symbol indicates manual transmission.
The manual transmission warning symbol, often resembling gears or an exclamation mark, signals potential issues with your vehicle’s transmission system, requiring immediate attention to prevent damage.
What is the Transmission Warning Symbol?
The transmission warning symbol is a dashboard indicator that alerts drivers to potential issues with the vehicle’s transmission system. This symbol often appears as a gear icon, sometimes accompanied by a thermometer or exclamation mark, depending on the car’s make and model. It is designed to signal problems such as low transmission fluid levels, high transmission temperature, or faulty sensors. The symbol may also illuminate if there are issues with the solenoid or internal components of the transmission. Understanding this symbol is crucial for maintaining the health of your vehicle, as ignoring it can lead to severe damage and costly repairs. Always consult your owner’s manual to identify the specific meaning of the symbol in your car, as interpretations can vary between manufacturers. Prompt action is essential to ensure the transmission operates smoothly and safely;
Importance of the Warning Symbol
The transmission warning symbol plays a critical role in maintaining vehicle safety and performance. It serves as an early alert system, notifying drivers of potential issues before they escalate into major problems. Ignoring this symbol can lead to severe damage to the transmission, resulting in costly repairs or even complete system failure. The warning symbol is particularly important for manual transmissions, where issues like worn gears or low fluid levels can cause abrupt malfunctions. Addressing the alert promptly ensures the transmission operates efficiently, preventing unexpected breakdowns and maintaining control while driving. Regular monitoring of this symbol, combined with proper maintenance, is essential for extending the lifespan of your vehicle’s transmission and ensuring reliable performance on the road. Always consult your owner’s manual for specific guidance on interpreting and responding to the warning symbol.
Common Causes of the Warning Light
Low transmission fluid, high temperature, faulty sensors, or solenoid issues often trigger the warning light, signaling potential manual transmission problems that need immediate attention to prevent damage.
Low Transmission Fluid Level
A low transmission fluid level is a common cause of the warning light. Transmission fluid lubricates gears and regulates temperature. If levels drop due to leaks or wear, the system can overheat, causing damage. Driving with low fluid can lead to increased friction between components, potentially damaging gears and seals. Regular fluid checks are essential to maintain proper levels. If the light comes on, check the fluid level and top it off if necessary. However, if the fluid is dirty or depleted significantly, it may indicate a larger issue. Ignoring this can lead to costly repairs, such as replacing damaged parts or even the entire transmission system. Always consult your owner’s manual for guidance on fluid types and levels to ensure your transmission operates smoothly and efficiently.
- Causes: Leaks, worn seals, or insufficient fluid during servicing.
- Effects: Increased friction, overheating, and potential gear damage.
High Transmission Temperature
A high transmission temperature is a critical issue that triggers the warning light. This occurs when the transmission overheats, often due to heavy towing, driving in extreme heat, or a malfunctioning cooling system. Prolonged exposure to high temperatures can damage internal components, such as seals, gears, and clutch packs, leading to premature wear. If the temperature rises too high, the transmission may enter “limp mode” to protect itself, reducing performance and functionality. It’s essential to address this issue promptly to prevent irreversible damage. Pull over and allow the vehicle to cool down if the temperature warning appears. Check for blocked coolers, low fluid levels, or faulty sensors. Ignoring this warning can result in costly repairs or even complete transmission failure.
- Causes: Heavy loads, hot climates, or faulty cooling systems.
- Effects: Internal component damage and reduced performance.
Faulty Transmission Sensors
Faulty transmission sensors are a common cause of the warning light appearing on your dashboard. These sensors monitor critical aspects of your transmission, such as speed, temperature, and fluid pressure, ensuring smooth operation. If a sensor fails or malfunctions, it can send incorrect data to the vehicle’s computer, leading to improper gear shifts or transmission slipping; Common issues include worn-out sensors, damaged wiring, or software glitches. Ignoring this problem can result in erratic transmission behavior, reduced performance, or even complete system failure. It’s crucial to inspect and replace faulty sensors promptly to restore proper transmission function. Always refer to your owner’s manual or consult a professional mechanic for accurate diagnosis and repair.
- Causes: Worn sensors, damaged wiring, or software issues.
- Effects: Erratic shifting, slipping, or transmission failure.
Solenoid Issues
Solenoid issues are another common reason for the transmission warning light to illuminate. Transmission solenoids are electro-hydraulic valves that regulate fluid pressure within the system, ensuring proper gear shifts. If a solenoid fails, it can disrupt the flow of transmission fluid, leading to erratic shifting, slipping, or even complete loss of gear engagement. Common causes include electrical malfunctions, worn-out solenoid seals, or debris in the fluid. Ignoring solenoid problems can exacerbate transmission damage, potentially requiring costly repairs. Early diagnosis is key, as solenoid replacement is often more affordable than rebuilding the entire transmission. Always consult a mechanic to identify and address solenoid-related issues promptly.
- Causes: Electrical faults, worn seals, or contaminated fluid.
- Effects: Slipping, erratic shifting, or loss of gear engagement.

Immediate Steps When the Warning Light Appears
When the transmission warning light illuminates, it is crucial to act swiftly to prevent further damage. Safely pull over to a well-lit, flat surface and avoid driving further until the issue is diagnosed. Turn off the engine and engage the parking brake to ensure your safety. Check your owner’s manual to interpret the specific warning symbol, as its meaning may vary by manufacturer. Look for additional symptoms, such as unusual noises, vibrations, or a burning smell, which can help identify the problem. Avoid sudden acceleration or heavy loads until the issue is resolved. Contact a qualified mechanic promptly to assess the situation and recommend necessary repairs; Ignoring the warning light can lead to severe transmission damage, resulting in costly and time-consuming fixes.
- Pull over safely and avoid driving.
- Check the owner’s manual for symbol interpretation.
- Look for additional symptoms like noise or smell.
- Contact a mechanic for professional diagnosis.
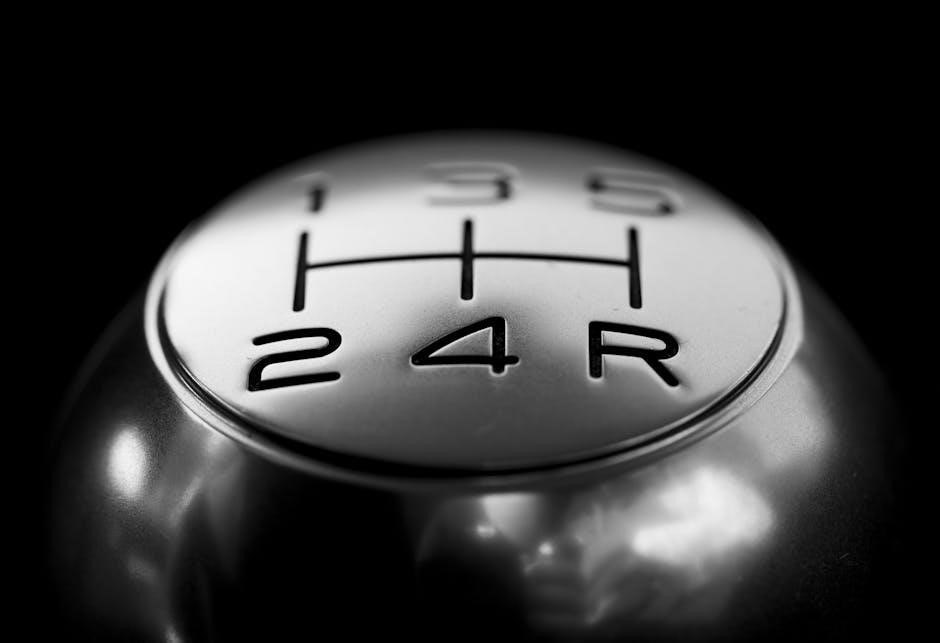
Manual Transmission vs. Automatic Transmission
Manual and automatic transmissions differ significantly in operation and driver interaction. A manual transmission requires the driver to manually shift gears using a clutch pedal and gear lever, offering greater control over gear selection. This is particularly useful in situations like hill climbing or towing, where precise control is beneficial. Automatic transmissions, on the other hand, automatically shift gears based on vehicle speed and throttle input, providing ease of use and convenience. While manual transmissions are often associated with better fuel efficiency and lower costs, automatics are preferred for their simplicity and reduced driver effort. Both systems, however, rely on proper maintenance to function optimally. Understanding the unique characteristics of each can help drivers address transmission-related issues more effectively, especially when a warning symbol appears.
- Manual transmissions require driver engagement with gears and clutch.
- Automatic transmissions shift gears automatically for convenience.
- Manuals often offer better fuel efficiency and control.
- Automatics are easier to operate in heavy traffic.

Common Issues Specific to Manual Transmissions
Manual transmissions often experience grinding noises, difficulty shifting gears, and clutch wear. These issues arise from worn components or improper clutch engagement, requiring prompt attention to avoid costly repairs.
- Grinding noises indicate worn gears or synchronizers.
- Difficulty shifting may result from clutch or linkage problems.
Grinding Noises
Grinding noises in a manual transmission are often indicative of worn or damaged components. These noises typically occur when shifting gears and can signal issues with the gears themselves, the synchronizers, or the clutch. If left unaddressed, these problems can escalate, leading to more severe damage and costly repairs. It is essential to have the transmission inspected by a qualified mechanic to identify the source of the grinding noise and implement the necessary fixes. Regular maintenance, such as checking the transmission fluid and ensuring proper clutch engagement, can help prevent these issues from arising in the future. Addressing grinding noises promptly is crucial to maintaining the overall health and performance of the manual transmission system.
Difficulty Shifting Gears
Difficulty shifting gears in a manual transmission can be caused by worn or damaged components, such as the synchronizers, clutch, or gear teeth. This issue may manifest as hesitation, abrupt shifting, or failure to engage gears smoothly. If left unchecked, it can lead to further damage and costly repairs. Common causes include worn synchronizer rings, low transmission fluid levels, or improper clutch pedal engagement. In some cases, debris or contamination within the transmission can also contribute to this problem. It is essential to address gear-shifting difficulties promptly to prevent more severe damage. Consulting the owner’s manual or visiting a qualified mechanic can help identify the root cause and implement the necessary repairs. Regular maintenance, such as checking transmission fluid and ensuring proper clutch alignment, can also help prevent these issues from occurring.

Understanding Dashboard Symbols Related to Transmission
The manual transmission dashboard symbols, such as gears or exclamation marks, indicate specific issues like low fluid levels or overheating, requiring immediate driver attention to prevent damage.
Gear Symbols
Gear symbols on your dashboard are essential indicators of your vehicle’s transmission status. These symbols often appear as a gearwheel, sometimes accompanied by an exclamation mark, and are specific to manual or automatic transmissions. The “M” symbol, for instance, denotes manual mode, allowing drivers to shift gears manually for better control. Other gear symbols, like “D” for drive or “R” for reverse, indicate the current gear selection. If a gear symbol illuminates with a warning, it signals potential issues such as low transmission fluid, overheating, or faulty sensors. Ignoring these warnings can lead to severe damage, so immediate action is crucial. Always consult your owner’s manual to understand the specific meaning of gear symbols in your vehicle, as interpretations may vary by manufacturer. Addressing these alerts promptly ensures optimal performance and prevents costly repairs.
Exclamation Mark Symbols
An exclamation mark symbol, often paired with a gear or transmission icon, is a critical warning indicator for manual transmissions. This symbol alerts drivers to potential issues requiring immediate attention, such as low transmission fluid levels, high temperatures, or faulty sensors. If illuminated, it signals that the transmission system is malfunctioning or at risk of damage. Common causes include overheating, fluid leaks, or sensor malfunctions. Ignoring this warning can lead to severe damage, costly repairs, or even complete transmission failure. Always consult your vehicle’s owner’s manual to understand the specific meaning of the exclamation mark symbol, as interpretations may vary by manufacturer. Addressing the issue promptly ensures vehicle safety and optimal performance. Immediate steps, such as pulling over or reducing speed, may be necessary to prevent further damage. This symbol is a clear indication that professional inspection is required to diagnose and resolve the underlying problem. Regular monitoring of transmission health can help prevent such alerts from appearing unexpectedly. By staying vigilant and responsive to these warnings, drivers can protect their vehicle’s transmission system and avoid unnecessary expenses. Additionally, familiarizing yourself with other related symbols, such as the “M” for manual mode, can enhance your understanding of your vehicle’s communication. Remember, early action is key to maintaining your vehicle’s longevity and functionality.
The Role of the Owner’s Manual in Interpreting Symbols
The owner’s manual plays a crucial role in interpreting dashboard symbols, including those related to manual transmission alerts. It provides detailed explanations of each symbol, helping drivers understand their meanings and the actions required. For instance, the manual can clarify that an exclamation mark within a gear symbol indicates a transmission issue, such as low fluid levels or high temperatures. By consulting the manual, drivers can identify the specific problem and take appropriate steps, such as pulling over or checking fluid levels. This resource ensures accurate interpretations, preventing misunderstandings that could lead to ignored warnings and costly repairs. Regularly reviewing the manual familiarizes drivers with their vehicle’s unique symbols, enhancing their ability to respond effectively. It also highlights the importance of addressing transmission alerts promptly to maintain vehicle safety and performance. The manual serves as a personalized guide, tailored to the vehicle’s make and model, ensuring drivers are well-informed and prepared for any situation.
Troubleshooting the Transmission Warning Light
Troubleshooting the transmission warning light involves a systematic approach to identify and address the underlying issue. First, safely pull over and check the transmission fluid level using the dipstick, ensuring it is within the recommended range. If the fluid level is low, replenish it with the appropriate type specified in the owner’s manual. Next, scan for error codes using an OBD-II scanner to pinpoint the problem. Common issues include faulty sensors, solenoid malfunctions, or high transmission temperatures. Listen for unusual noises, such as grinding or whining, which can indicate worn gears or bearings. If the light persists, inspect the transmission for signs of leaks or physical damage. In cases where DIY troubleshooting is inconclusive, it is essential to consult a professional mechanic to avoid further damage. Addressing these issues promptly ensures the longevity and performance of your vehicle’s transmission system. Regular checks and maintenance can prevent future occurrences.

When to Visit a Mechanic
If the transmission warning light persists after initial troubleshooting, it is crucial to visit a mechanic to prevent further damage; A professional can diagnose complex issues like faulty solenoids, internal gear damage, or sensor malfunctions using specialized tools. If you notice symptoms such as slipping gears, unusual noises, or a burning smell, immediate attention is required. Additionally, if the transmission overheats or fluid levels remain inconsistent, consulting a mechanic is essential. Ignoring these signs can lead to costly repairs or even complete transmission failure. A qualified mechanic can provide a detailed inspection and recommend necessary repairs to ensure your vehicle operates safely and efficiently. Delaying professional assistance may result in more severe and expensive problems down the road. Always prioritize your vehicle’s health by seeking expert help when transmission issues arise.

Preventative Maintenance for Transmission Health
Regular maintenance is essential to ensure the longevity and smooth operation of your transmission system. Start by checking the transmission fluid level regularly, as low or degraded fluid can lead to premature wear and damage. Use the type of fluid recommended by your vehicle’s manufacturer for optimal performance. Additionally, monitor the transmission temperature, especially during heavy use or in hot climates, as overheating can cause significant damage. Inspect the transmission for any signs of leaks or damage and address them promptly. Routine servicing, such as filter replacements and software updates, can also help maintain transmission health. By following these preventative steps and adhering to the recommendations in your owner’s manual, you can reduce the risk of transmission issues and extend the life of your vehicle.
Transmission Fluid Checks
Regular transmission fluid checks are crucial for maintaining the health of your vehicle’s transmission system. The fluid lubricates moving parts, prevents overheating, and ensures smooth gear transitions. To check the fluid, locate the transmission dipstick under the hood, typically labeled “Transmission Fluid” or with a gear symbol. Pull out the dipstick and wipe it clean with a lint-free cloth. Insert it back and pull it out again to get an accurate reading. Check the fluid level against the manufacturer’s guide, usually marked on the dipstick. The fluid color should be light amber; dark or black fluid indicates it needs changing. If the level is low, top it up with the recommended type of fluid. Old or contaminated fluid can cause the transmission warning light to illuminate, signaling potential issues. Regular fluid checks can prevent costly repairs and extend the life of your transmission.
Monitoring Transmission Temperature
Monitoring transmission temperature is vital to ensure the system operates within safe limits. Many modern vehicles feature a dashboard gauge or warning light with a thermometer symbol, indicating when the transmission overheats. High temperatures can result from heavy loads, towing, or driving in extreme conditions. If the transmission warning light illuminates, pull over immediately to prevent damage. Check for signs like a burning smell or unusual noises, as these indicate overheating. Use the owner’s manual to locate the temperature gauge or symbol specific to your vehicle. Addressing temperature issues promptly can prevent costly repairs and extend the transmission’s lifespan. Regular fluid checks and maintaining proper levels are also essential for cooling the system. Ignoring high temperatures can lead to severe damage, emphasizing the importance of vigilant monitoring and timely action.

The Impact of Ignoring the Warning Light
Ignoring the transmission warning light can lead to severe consequences, including costly repairs and potential system failure. Prolonged neglect of the alert may result in damaged gears, bearings, and torque converters, which can render the transmission inoperable. The vehicle may experience reduced performance, slipping gears, and difficulty shifting, ultimately leading to a breakdown. Overheating, low fluid levels, or sensor malfunctions can escalate into major issues if left unaddressed. Continuous operation with an illuminated warning light can cause irreversible damage, requiring a full transmission replacement. This not only increases repair costs but also compromises safety on the road. Addressing the issue promptly is crucial to prevent further deterioration and ensure the longevity of the transmission system. Ignoring the warning light can lead to a cascade of problems that are both time-consuming and expensive to resolve.
Cost of Neglecting Transmission Issues
Neglecting transmission issues can result in significant financial burdens. Ignoring warning signs like unusual noises, slipping gears, or dashboard alerts often leads to more severe damage, requiring costly repairs. Replacing a faulty transmission can range from $1,500 to $3,500 or more, depending on the vehicle’s make and model. Additionally, related components such as torque converters or solenoids may need replacement, further increasing expenses. In severe cases, a completely rebuilt or new transmission may be necessary, escalating costs considerably. Early intervention is crucial to avoid these high repair bills. Regular maintenance and prompt attention to warning lights can prevent minor issues from developing into major, expensive problems. The financial impact of neglecting transmission issues underscores the importance of addressing them without delay.
Modern Technology in Transmission Systems
Modern transmission systems have evolved significantly, incorporating advanced technologies to enhance performance, efficiency, and reliability. Dual-clutch transmissions (DCTs) and continuously variable transmissions (CVTs) are examples of innovations that provide smoother gear shifts and improved fuel efficiency. Automated manual transmissions (AMTs) blend the benefits of manual and automatic systems, offering precise control without driver intervention. Additionally, modern vehicles often feature adaptive transmission systems that learn driving habits and adjust gear shifts accordingly. These technologies are complemented by advanced sensors and software that monitor transmission health, enabling real-time adjustments and early detection of potential issues. Such advancements not only enhance driving experiences but also contribute to safer and more efficient vehicles. The integration of these technologies ensures that transmission systems remain a cornerstone of modern automotive engineering.
Benefits of Addressing Transmission Issues Promptly
Addressing transmission issues promptly offers numerous benefits, including preventing costly repairs, ensuring vehicle safety, and maintaining optimal performance. Early intervention can stop minor problems from escalating into major system failures, potentially saving thousands of dollars in repair costs. Additionally, timely repairs enhance driving safety by preventing sudden breakdowns or loss of control while driving. Properly functioning transmissions also improve fuel efficiency and reduce emissions, contributing to environmental sustainability. Regular maintenance and prompt attention to warning signs can extend the lifespan of your vehicle’s transmission system. By acting quickly, you ensure smoother gear shifts, reduce the risk of unexpected failures, and maintain the overall reliability of your car. Ignoring transmission issues can lead to severe consequences, making it crucial to address them without delay. Prompt action not only protects your investment but also ensures a safer and more enjoyable driving experience.
How to Read Transmission Symbols on the Dashboard
Reading transmission symbols on your dashboard requires a combination of observation and reference to your vehicle’s owner’s manual. Common symbols include a gear or exclamation mark, which indicate potential transmission issues. When a symbol illuminates, note its appearance and color, as red typically signifies urgency. Consult your manual to match the symbol with its specific meaning, as interpretations can vary by manufacturer. For manual transmissions, symbols like “M” for manual mode or gear indicators may appear. Pay attention to any accompanying lights or messages, such as a temperature warning or gear shift indicator. Understanding these symbols allows you to identify issues early, preventing further damage. If unsure, it’s best to consult a professional mechanic to ensure proper diagnosis and repair. Regular familiarity with these symbols enhances your ability to respond appropriately and maintain your vehicle’s health.
Final Thoughts on Transmission Health
Maintaining optimal transmission health is critical for the longevity and performance of your vehicle. The transmission warning symbol serves as a vital indicator of potential issues, such as low fluid levels or sensor malfunctions. Addressing these problems promptly can prevent costly repairs and ensure smooth operation. Regular maintenance, including fluid checks and temperature monitoring, is essential. Ignoring the warning light can lead to severe damage, affecting both safety and performance. By staying informed and proactive, drivers can uphold their vehicle’s transmission health, ensuring a reliable and efficient driving experience. Remember, the transmission is a cornerstone of your car’s functionality, and its proper care is paramount for uninterrupted journeys.
Importance of Regular Vehicle Maintenance
Regular vehicle maintenance is essential for ensuring the longevity and optimal performance of your car. By adhering to a routine maintenance schedule, you can identify potential issues early, preventing them from escalating into costly repairs. This includes checking transmission fluid levels, monitoring temperatures, and inspecting sensors. Regular servicing helps maintain smooth gear shifts and prevents sudden failures, ensuring your vehicle runs efficiently. Neglecting maintenance can lead to severe transmission damage, which is both expensive and time-consuming to repair. Additionally, proper care extends the lifespan of your vehicle and enhances safety on the road. Always refer to your owner’s manual for specific maintenance recommendations tailored to your car. Consistent upkeep not only saves money but also provides peace of mind, knowing your vehicle is in top condition.