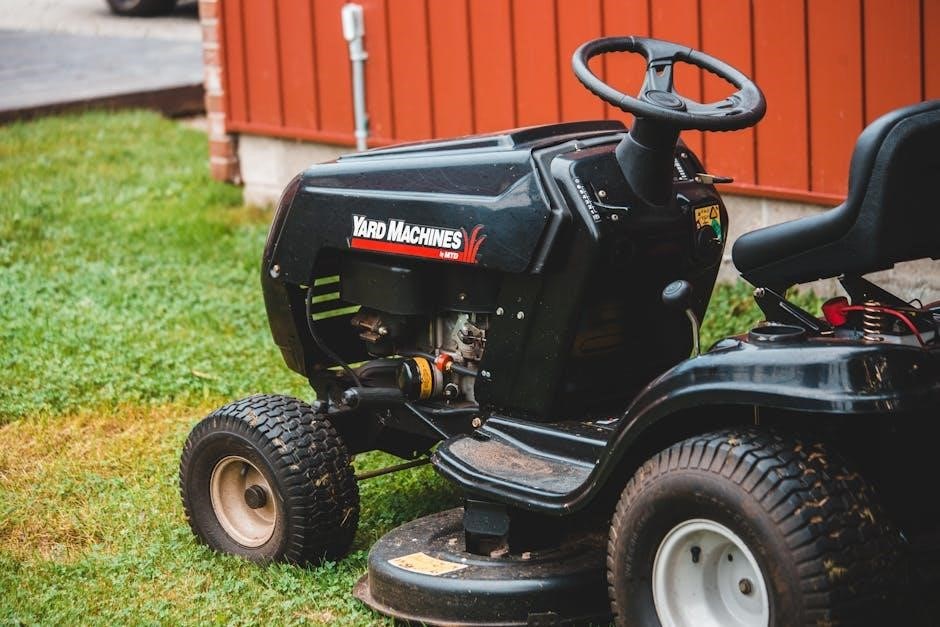
powersmart lawn mower parts manual
Welcome to the PowerSmart Lawn Mower Parts Manual, your comprehensive guide for understanding, maintaining, and repairing your lawn mower. This manual outlines essential components, safety tips, and detailed instructions to ensure optimal performance and longevity. Refer to the exploded diagrams and parts list for accurate identification and ordering of genuine OEM parts. Proper use of this manual will help you troubleshoot issues, perform routine maintenance, and enhance your mowing experience. Always prioritize safety and use original equipment manufacturer (OEM) parts for reliability and durability.
1.1 Overview of the Manual’s Purpose and Structure
This manual is designed to provide clear instructions for the safe operation, maintenance, and repair of your PowerSmart lawn mower. It is structured to guide users through essential tasks, from initial setup to troubleshooting. The manual includes safety guidelines, exploded diagrams, and a detailed parts list to help identify components. Each section is organized to ensure ease of use, covering topics such as assembly, routine maintenance, and repair procedures. Refer to this guide for optimal performance and longevity of your lawn mower.
1.2 Importance of Using OEM Parts
Using original equipment manufacturer (OEM) parts is crucial for maintaining your PowerSmart lawn mower’s performance and safety. These parts are specifically designed for your model, ensuring precise fitment and reliability. Non-OEM parts may void your warranty and pose safety risks. Always choose genuine components to protect your investment and ensure longevity. Refer to the parts list for correct identification and ordering information.

Safety Guidelines and Precautions
Adhere to safety guidelines to ensure safe operation. Wear protective gear, clear debris, and follow manual instructions. Never leave the mower unattended and keep children away.
2.1 General Safety Tips for Lawn Mower Operation
Always wear protective gear, including gloves, safety glasses, and sturdy footwear. Clear the area of debris before mowing. Avoid loose clothing that could get caught. Keep children and pets at a safe distance. Never operate the mower while under the influence of alcohol or drugs. Ensure the mower is on a stable, level surface. Follow all instructions in the manual, and never leave the mower unattended while it is in operation. Stay alert and cautious during use.
2.2 Safety Messages and Warnings in the Manual
The manual contains essential safety messages and warnings to ensure safe operation and maintenance of your PowerSmart lawn mower. These alerts highlight potential hazards, such as injury risks or equipment damage. Symbols like DANGER, WARNING, CAUTION, and NOTE are used to draw attention to critical information. Always read and follow these guidelines carefully to avoid accidents and ensure proper functioning of the mower. Adhere to all safety precautions for a secure mowing experience.
2.3 Handling Chemicals and Fuels Safely
When handling chemicals or fuels for your PowerSmart lawn mower, always wear protective gear, including gloves and eyewear. Ensure proper ventilation to avoid inhaling fumes. Store fuels and chemicals in approved containers, away from heat sources or open flames. Dispose of waste materials responsibly, following local regulations. Never mix chemicals or overfill fuel tanks. Refer to the manual for specific guidelines on handling and storing these substances safely to prevent accidents and ensure environmental protection.

Unpacking and Inventory of Parts
Carefully unpack the lawn mower and all components, ensuring no damage. Verify each part against the provided list to confirm completeness. Retain all packaging until assembly is complete to prevent loss or damage. This step ensures all necessary components are accounted for before proceeding with assembly or maintenance, using only genuine OEM parts for reliability and performance.
3.1 Steps to Unpack the Lawn Mower
- Carefully remove the lawn mower and all accessories from the carton.
- Inspect for any visible damage during shipping.
- Locate and review the parts list to identify all components.
- Retain the packaging until the mower is fully assembled and operational.
- Ensure no parts are missing before proceeding with assembly or use.
3.2 Verifying the Parts Against the List
After unpacking, carefully compare each component with the provided parts list in the manual. Ensure all items, including hardware and accessories, are present and undamaged. Cross-reference each part using the exploded diagram for clarity. If any discrepancies are found, contact PowerSmart customer support immediately. Do not discard the original packaging until all parts are verified and accounted for to avoid potential issues during assembly or operation.
3.4 Importance of Retaining Packaging
Retaining the original packaging is crucial for protecting the lawn mower and its components during storage or transportation. The packaging materials, such as boxes and inserts, are specifically designed to prevent damage. Keep all packaging until the mower is fully assembled and verified to be in good working condition. This ensures that any potential returns or repairs can be handled efficiently, maintaining the product’s warranty and overall value. Proper storage also safeguards against accidental damage;
Assembly and Setup Instructions
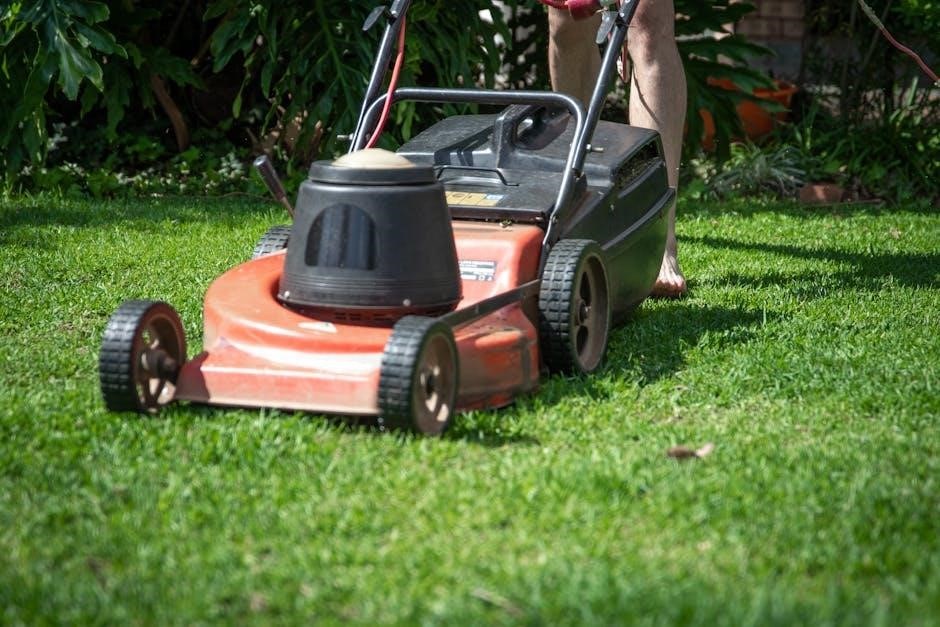
Follow the exploded diagram to align and assemble parts correctly. Attach handles securely, install the blade, and ensure all components are tightened properly for safe operation. Check alignment.
4.1 Assembling the Lawn Mower
Begin by unpacking and verifying all parts against the list. Use the exploded diagram for reference. Attach the handlebars securely, ensuring all bolts are tightened. Install the blade carefully, following the manual’s alignment guide. Connect any additional components like the grass catcher or mulching kit. Double-check all connections and ensure proper tightening for safety and functionality. Refer to the parts list for specific instructions and torque specifications.
4.2 Adjusting and Securing Parts
After assembly, ensure all components are properly aligned and securely fastened. Tighten bolts and nuts to the torque specifications outlined in the manual. Adjust the handlebars to your preferred height and ensure the blade is level for even cutting. Double-check that all safety features, such as the blade brake, are functioning correctly. Regularly inspect and tighten any loose parts to prevent wear and ensure optimal performance. Always refer to the manual for specific adjustment guidelines.

Operating the PowerSmart Lawn Mower
Learn how to safely start, operate, and stop your lawn mower. This section covers essential techniques for effective mowing, including engine operation and blade control. Follow guidelines for optimal performance and safety.
5.1 Starting and Stopping the Engine
To start the engine, ensure the lawn mower is on a level surface and the brake is engaged. Pull the choke lever to the “start” position, then pull the starter cord firmly. Once the engine starts, move the choke to the “run” position. To stop, switch off the ignition and allow the engine to cool. Always follow safety guidelines and ensure the area is clear before operating. Refer to the manual for specific instructions.
5.2 Mowing Techniques and Best Practices
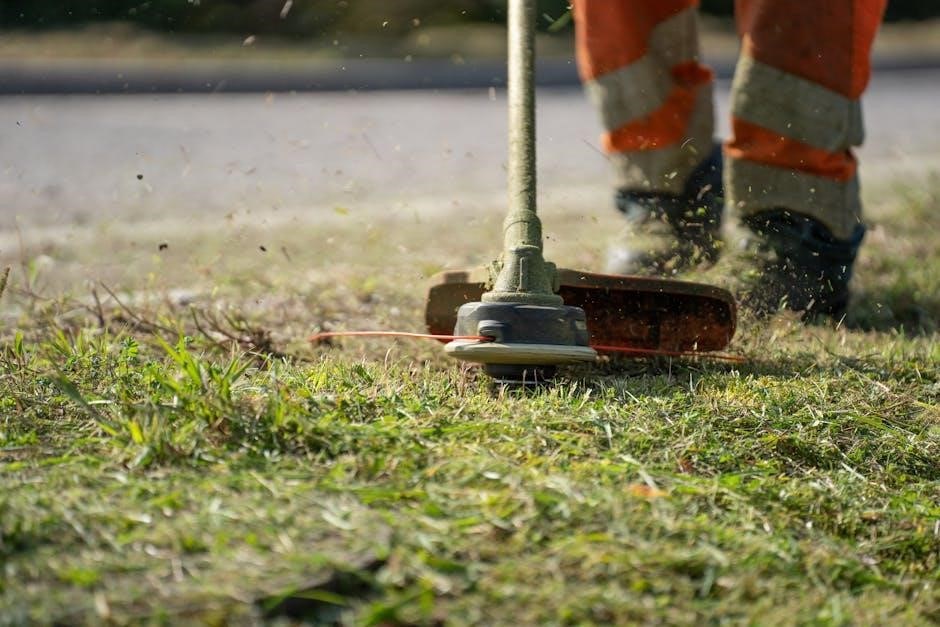
For optimal results, mow in steady, overlapping passes, maintaining a consistent pace. Avoid cutting more than one-third of the grass blade length in one session. Leave grass clippings on the lawn to act as a natural fertilizer. For taller grass, raise the mowing deck and gradually lower it. Always keep the mower blade sharp to ensure clean cuts and prevent tearing. Regularly clean the mower deck to maintain efficiency and prevent clogging.
Maintenance and Servicing
Regular maintenance ensures your PowerSmart lawn mower performs optimally. Schedule routine tasks like oil changes, blade sharpening, and air filter cleaning. Seasonal preparation, such as winter storage and spring tune-ups, is essential for longevity. Refer to the manual for specific servicing intervals and guidelines to keep your mower in top condition year-round.
6.1 Routine Maintenance Tasks
Perform routine maintenance tasks regularly to ensure your PowerSmart lawn mower operates efficiently. Check and change the engine oil, sharpen or replace the cutting blade, and clean or replace the air filter. Inspect the mower deck for debris and ensure all bolts and nuts are tightened. Lubricate moving parts and check tire pressure. Regular maintenance prevents premature wear and extends the life of your lawn mower. Always refer to the manual for specific instructions and recommendations.
6.2 Seasonal Maintenance and Preparation
Prepare your PowerSmart lawn mower for seasonal changes to maintain performance. Before storing, drain the fuel tank, clean the mower deck, and apply rust-inhibiting oil. Store in a dry, protected area. In spring, inspect all parts, sharpen the blade, and ensure proper tire pressure. Regular seasonal maintenance ensures your mower remains in optimal condition and ready for the next mowing season. Always follow the manual’s guidelines for specific preparation steps.
6.3 Storage Tips for Off-Season
Properly store your PowerSmart lawn mower during the off-season to maintain its condition. Clean the mower deck and blade thoroughly, removing dirt and debris. Empty the fuel tank or stabilize the fuel with a conditioner. Apply rust-inhibiting oil to metal parts and store in a dry, protected area. Cover the mower to protect from dust and moisture. Ensure all parts are secure and check for any damage before storage to prevent issues when restarting in the spring.
Troubleshooting Common Issues
Identify and resolve common problems like engine issues or uneven cutting. Use the manual’s diagnostic guides to find solutions and maintain your mower’s performance effectively.
7.1 Identifying and Diagnosing Problems
Start by reviewing the manual’s troubleshooting section to identify common issues like engine malfunction or uneven cutting. Use the exploded diagrams to locate parts and refer to diagnostic guides for step-by-step checks. Always follow safety guidelines before attempting repairs. Check for worn or damaged components and compare against the parts list to ensure accurate identification. This systematic approach helps pinpoint problems quickly and effectively, preventing further damage and ensuring proper functionality.
7.2 Solutions for Common Lawn Mower Issues
Address common issues like a faulty starter or clogged deck by referring to the manual’s troubleshooting guide. Replace worn blades or belts using genuine OEM parts for optimal performance. If the engine stalls, check fuel levels and air filters. For uneven cutting, adjust the blade height or sharpen dull blades. Always use the exploded diagram to locate and replace parts accurately. Regular maintenance and timely repairs ensure your lawn mower runs smoothly and efficiently.

Exploded View and Parts List
This section provides a detailed visual breakdown of the lawn mower’s components through an exploded diagram, along with a comprehensive list of part numbers and descriptions for easy identification and ordering of genuine OEM parts.
8.1 Understanding the Exploded Diagram
The exploded diagram visually represents your lawn mower’s assembly, displaying each part in relation to others. Use this diagram to identify components, understand their placement, and locate specific parts quickly. Refer to the corresponding parts list for exact numbers and descriptions. This tool aids in diagnosing issues, ordering replacements, and ensuring accurate repairs. Always cross-check with the parts list to confirm compatibility and part numbers before making any purchases or adjustments to your mower.
8.2 Locating Parts Using the Diagram
Use the exploded diagram to identify and locate specific parts on your lawn mower. Each component is labeled with a reference number, corresponding to the parts list. Start by finding the general area of the part you need, then match its number to the list for details. This method ensures accurate identification and simplifies the process of ordering replacement parts. Always cross-reference with the parts list to confirm compatibility and part numbers.
Repair and Replacement Guidance
Identify worn or damaged parts using the exploded diagram. Use the correct tools and materials to replace components, ensuring reliability and safety. Always refer to the parts list for accurate identification and ordering of genuine OEM parts to maintain optimal performance and warranty validity.
9.1 Steps for Replacing Worn or Damaged Parts
Start by disconnecting power and ensuring the mower is safe to work on. Refer to the exploded diagram to locate the damaged part. Remove the old component using appropriate tools, then install the new part securely. Tighten all fasteners properly and reassemble any components. Test the mower to ensure proper function. Always follow safety guidelines and use genuine OEM parts for reliable performance and longevity. If unsure, consult the manual or contact customer support for assistance.
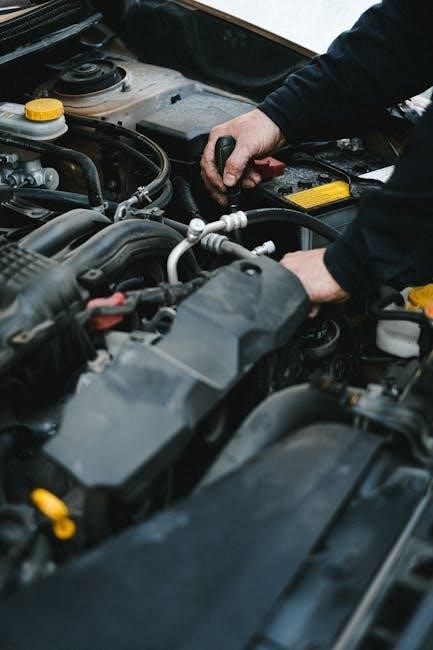
9.2 Tools and Materials Needed for Repairs
For repairs, essential tools include wrenches, screwdrivers, pliers, and a torque wrench. Materials like grease, oil, and replacement filters may be required. Always use genuine OEM parts to ensure compatibility and reliability. Refer to the exploded diagram for specific part locations and torque specifications. Keep a clean workspace and follow safety guidelines to avoid accidents; Proper tools and materials ensure efficient and effective repairs, maintaining your lawn mower’s performance and longevity.

Environmental Considerations
This section covers eco-friendly mowing practices, proper disposal of old parts, and sustainable maintenance tips. Using OEM parts and efficient techniques minimizes environmental impact and promotes sustainability.
10.1 Proper Disposal of Old Parts
Always dispose of old lawn mower parts responsibly to minimize environmental impact. Separate metal, plastic, and hazardous materials like batteries or fluids. Check local regulations for designated recycling centers or hazardous waste facilities. Never dispose of parts in regular trash or landfill. Draining fluids and cleaning parts before disposal is essential. Recycle materials whenever possible and avoid releasing harmful substances into the environment. Proper disposal ensures sustainability and eco-friendly practices.
10.2 Eco-Friendly Mowing Practices
Adopt eco-friendly mowing practices to reduce environmental impact. Adjust mowing height to 2.5-3 inches to promote healthy grass growth, reducing waste. Use mulching features to leave clippings on the lawn, acting as a natural fertilizer. Opt for cordless or electric mowers to minimize emissions. Regularly maintain your mower to ensure fuel efficiency and lower emissions. Follow seasonal mowing schedules and sharpen blades to avoid tearing grass, preserving its health and reducing waste.

Warranty and Customer Support
Your PowerSmart lawn mower is backed by a comprehensive warranty. Register your product and review the terms for coverage details. For inquiries or issues, contact PowerSmart customer support for assistance with troubleshooting, repairs, or parts. The support team is available to ensure your experience with the lawn mower is satisfactory and hassle-free.
11.1 Understanding the Warranty Coverage
The PowerSmart warranty provides coverage for defects in materials and workmanship for a specified period. It typically includes repair or replacement of faulty parts, excluding wear and tear. Review the manual for terms, as some components may have shorter coverage periods. Registration is often required to activate the warranty. Ensure to keep proof of purchase and adhere to maintenance guidelines to maintain coverage eligibility and enjoy uninterrupted support for your lawn mower.
11.2 Contacting PowerSmart Customer Service
For assistance with your PowerSmart lawn mower, contact customer service via phone, email, or through the official website. Visit the support portal for detailed contact information and operating hours. Have your model number and manual ready for efficient assistance. The team is available to address warranty inquiries, technical support, and parts orders. Ensure to reach out during business hours for prompt resolution of any concerns or questions regarding your lawn mower.
Accessories and Additional Parts
Enhance your lawn mower’s performance with genuine PowerSmart accessories. Refer to the manual for recommended parts and ordering information to maintain optimal functionality and longevity.
12.1 Recommended Accessories for Enhanced Performance
Upgrade your PowerSmart lawn mower with authentic accessories like high-capacity batteries, mulching kits, and reinforced blades. These additions improve efficiency, cutting quality, and versatility. Use the parts diagram to identify compatible upgrades, ensuring a perfect fit. Genuine accessories maintain warranty coverage and optimize performance, extending the life of your mower. Always refer to the manual for installation guidance and part numbers to enhance your mowing experience effectively.
12.2 Ordering Genuine PowerSmart Parts
To ensure optimal performance and maintain your warranty, order genuine PowerSmart parts directly from authorized dealers or the official website. Use the parts diagram and manual to identify correct part numbers. Visit the PowerSmart website, enter the part number, and follow the checkout process. For assistance, contact PowerSmart customer service. Genuine parts guarantee proper fit, reliability, and compliance with safety standards, ensuring your lawn mower operates at its best.
Diagrams and Visual Guides
This section provides detailed diagrams and visual guides to help you understand and identify parts for your PowerSmart lawn mower. Use these resources to ensure proper assembly, maintenance, and repairs by referencing the exploded views and instructions provided.
13.1 Using the Parts Diagram for Reference
The parts diagram provides a detailed visual representation of your PowerSmart lawn mower, making it easier to locate and identify components. Use this diagram to cross-reference part numbers, ensuring accurate identification for repairs or replacements. It serves as a valuable tool for understanding how parts interact and fit together. Refer to the diagram alongside the manual to enhance your troubleshooting and maintenance efforts, ensuring all repairs align with manufacturer specifications.
13.2 Visual Instructions for Assembly and Repair
The manual includes detailed visual guides to assist with assembly and repair. These step-by-step instructions use images and labels to clearly illustrate each process. Refer to the diagrams for a better understanding of complex tasks, such as installing or replacing parts. Visual guides reduce errors by providing a clear, actionable reference, ensuring that all components are correctly assembled or repaired according to PowerSmart specifications.