
dieta dr gundry pdf gratis
Dieta Dr. Gundry: A Comprehensive Overview
Caution is advised when seeking a “Dieta Dr. Gundry PDF gratis”, as free downloads may contain inaccurate or outdated information, potentially harming your health journey.
Dr. Steven Gundry’s dietary approach, detailed in works like “The Plant Paradox” and “The Diet Evolution,” centers on minimizing lectins – proteins found in many plants – believed to trigger inflammatory responses. This evolution isn’t a traditional diet, but a lifestyle shift focused on optimizing gut health and gene expression.
The core idea revolves around identifying “enemy” foods, often seemingly healthy options, and prioritizing nutrient-dense alternatives. Numerous resources, including summaries and analyses, exist online, but be wary of seeking a “Dieta Dr. Gundry PDF gratis”. Such free downloads frequently lack the nuance of Gundry’s comprehensive work and may even contain misinformation.
Gundry’s research suggests that lectins can disrupt hormonal balance and contribute to weight gain. His diet aims to “switch off” genes linked to inflammation and disease, promoting overall wellbeing. Always consult a healthcare professional before making significant dietary changes.
The Core Principle: Lectins and Their Impact
Lectins, naturally occurring proteins in plants, are the cornerstone of Dr. Gundry’s dietary philosophy. He posits that these “sticky” proteins interfere with the human digestive process, triggering immune responses and inflammation. While plants are generally considered healthy, Gundry argues specific lectins can be detrimental, particularly in modern, hybridized varieties.
These proteins can damage the gut lining, leading to leaky gut syndrome and systemic inflammation. Be cautious when searching for a “Dieta Dr. Gundry PDF gratis”; reliable information is crucial. Gundry identifies “lectin-free” and “low-lectin” foods, advocating for olive oil, avocados, and certain leafy greens.
He believes minimizing lectin intake can improve energy levels, manage weight, and even influence gene expression. Understanding lectin’s impact is key to navigating this dietary approach effectively.

Understanding the Gundry Diet Phases
Avoid unofficial “Dieta Dr. Gundry PDF gratis” resources; the diet progresses through elimination, reintroduction, and maintenance phases for personalized results.
Phase 1: The Elimination Phase
The initial phase of Dr. Gundry’s diet is a strict elimination period, designed to reduce lectin intake and assess individual sensitivities. Be wary of “Dieta Dr. Gundry PDF gratis” materials during this crucial stage, as accuracy is paramount. This phase typically lasts around 30 days and involves removing all foods high in lectins – including grains, legumes, nightshades (tomatoes, peppers, eggplant), and most fruits.
Focus shifts to Gundry-approved foods like olive oil, leafy greens, and certain proteins. The goal isn’t weight loss initially, but rather reducing inflammation and identifying how your body responds without these common dietary components. It’s a period of resetting your gut microbiome and allowing your system to calm down. Rely on official sources, not potentially misleading free PDFs, for guidance during this foundational phase.
Phase 2: The Reintroduction Phase
Following the elimination phase, the reintroduction phase carefully tests your tolerance to previously restricted foods. This is not a free-for-all; it’s a methodical process of adding one food group at a time, observing for any adverse reactions. Avoid relying on a “Dieta Dr. Gundry PDF gratis” for this stage, as personalized observation is key.
Introduce a single lectin-containing food, like a small portion of white rice, and monitor symptoms – digestive issues, skin changes, fatigue – for several days. If no reaction occurs, that food may be cautiously included in your diet. If symptoms arise, eliminate it again. This phase helps pinpoint individual sensitivities and build a customized dietary plan. Accurate tracking, not generalized PDF advice, is vital for success.
Phase 3: The Maintenance Phase
The maintenance phase focuses on long-term adherence to a personalized Gundry diet, built upon the insights gained during reintroduction. It’s about establishing sustainable habits, prioritizing nutrient-dense foods, and continuing to listen to your body. Beware of simplistic advice found in a “Dieta Dr. Gundry PDF gratis”; individual needs vary.
This isn’t a rigid set of rules, but a flexible framework. Occasional indulgences are permissible, but mindful consumption is crucial. Continue to prioritize olive oil, beneficial fats, and protein sources. Regular self-assessment helps identify potential trigger foods; Long-term success relies on consistent effort and a commitment to understanding your unique physiological response, not a downloaded guide.

Foods to Embrace on the Gundry Diet
Prioritize official resources over a “Dieta Dr. Gundry PDF gratis” to accurately identify beneficial foods like olive oil, raw options, and optimal proteins.
Olive Oil: A Cornerstone of the Diet
Dr. Gundry emphasizes extra virgin olive oil as a foundational element of his diet, highlighting its potent polyphenol content and beneficial fats. However, navigating information online, particularly when searching for a “Dieta Dr. Gundry PDF gratis,” requires caution. Many free resources may misrepresent the nuances of oil selection.
Gundry recommends choosing high-quality, cold-pressed olive oil, as processing can diminish its health benefits. Be wary of downloads promising a complete diet plan; they might not detail the specific olive oil qualities crucial for success. Authentic guidance stresses the importance of this oil for reducing inflammation and supporting gut health – details often lacking in unofficial PDFs. Prioritize verified sources to ensure you’re utilizing olive oil effectively within the Gundry framework.
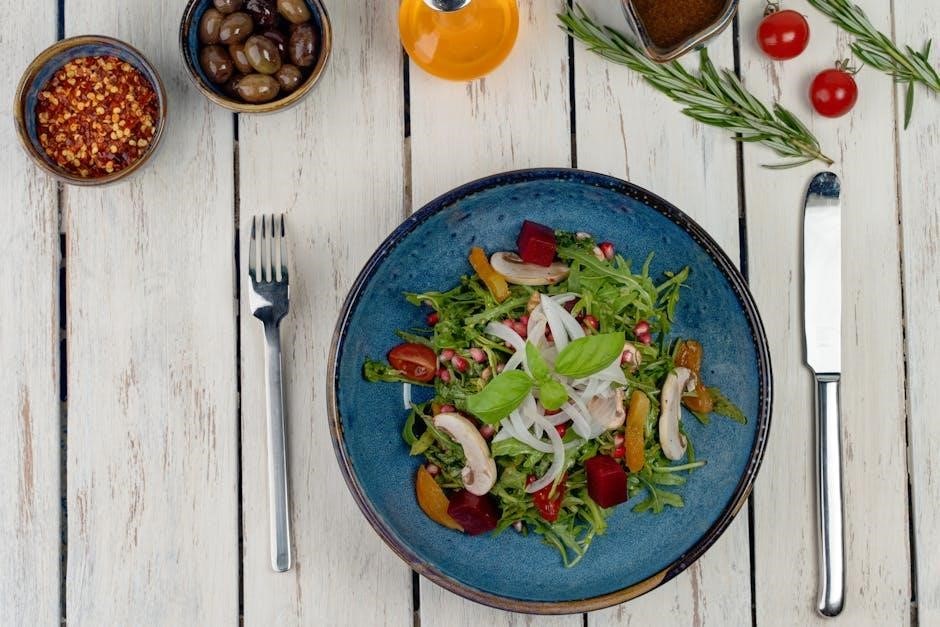
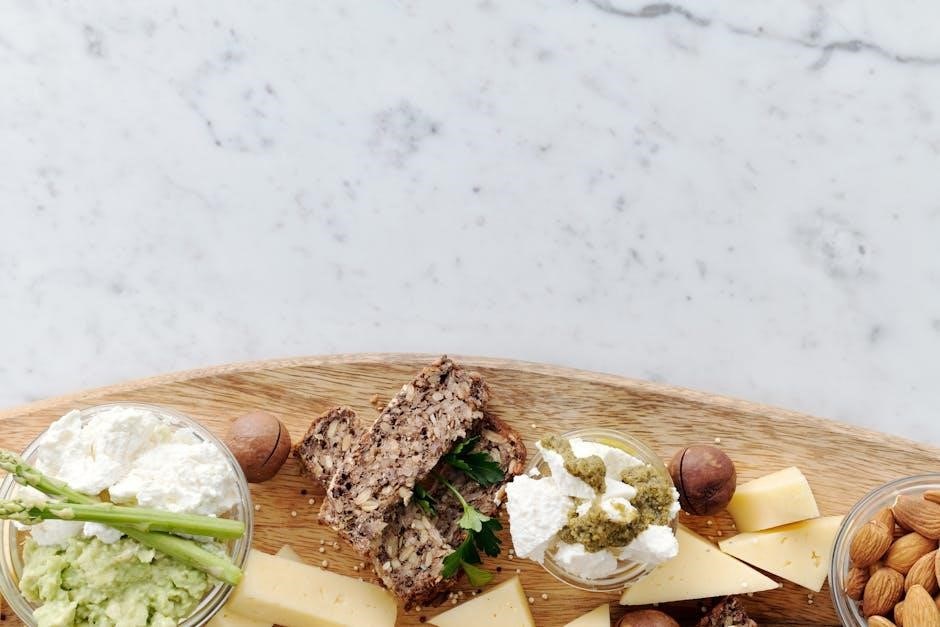
Beneficial Foods: Prioritizing Nutrient Density
The Gundry diet centers on maximizing nutrient intake from allowed foods. While searching for a “Dieta Dr. Gundry PDF gratis” might seem convenient, these often lack the detailed food lists and explanations necessary for optimal results. Gundry prioritizes foods rich in beneficial compounds, supporting cellular function and overall wellbeing.
Focus on leafy greens, sulfur-rich vegetables, and certain fruits – all detailed in his books, not typically comprehensively covered in free, downloadable PDFs. Beware of simplified lists; Gundry’s approach is nuanced. Prioritizing nutrient density means choosing foods that deliver the most benefits per calorie, a concept often glossed over in unofficial resources. Invest in authentic materials for accurate guidance on building a truly beneficial diet.
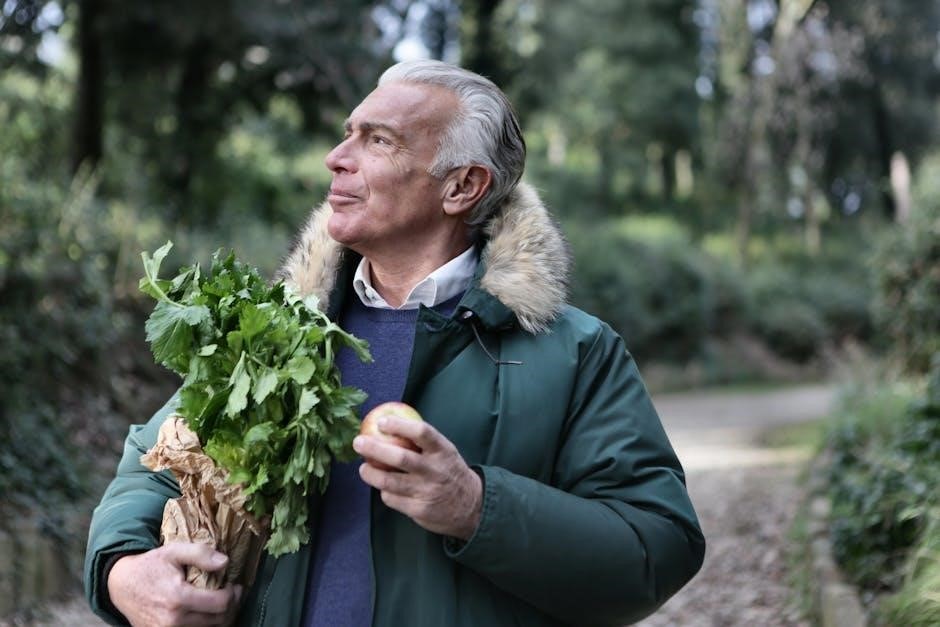
Raw Foods: Maximizing Enzyme Activity
Dr; Gundry emphasizes the importance of raw foods to preserve vital enzyme activity, crucial for digestion and nutrient absorption. A “Dieta Dr. Gundry PDF gratis” may not adequately convey the subtleties of incorporating raw elements effectively. Enzymes are heat-sensitive, diminishing during cooking; therefore, consuming raw options – where appropriate and safe – is key.
Focus on raw avocados, certain berries, and leafy greens. However, Gundry also cautions about lectin content in some raw vegetables, requiring specific preparation methods. Relying on unofficial PDFs risks missing these critical details. Maximizing enzyme intake supports gut health and reduces the burden on the digestive system, a cornerstone of the Gundry approach. Authentic resources provide the necessary nuance for safe and effective implementation.
Protein Sources: Choosing Optimal Options
Selecting appropriate protein sources is vital on the Gundry diet, prioritizing those low in lectins. A freely available “Dieta Dr. Gundry PDF gratis” might oversimplify these choices, potentially leading to unintended inflammation. Gundry recommends prioritizing wild-caught fish, grass-fed beef, and pasture-raised poultry as optimal sources.
He cautions against conventional farmed fish and factory-farmed meats due to their higher lectin content and inflammatory potential. Lamb and bison are also favored. Beware of incomplete information in unofficial PDFs; they may not detail the importance of sourcing or preparation methods. Adequate protein intake supports muscle maintenance and satiety, crucial for weight management and overall wellbeing within the Gundry framework. Prioritize quality over quantity.

Foods to Avoid: The “No-Go” List
Beware of “Dieta Dr. Gundry PDF gratis” lists; accurate avoidance of lectin-rich “enemy” and brown foods is crucial for diet success and health.
Lectins and “Enemy” Foods
Dr. Gundry’s diet centers around minimizing lectin intake, proteins found in plants that he argues can disrupt gut health and trigger autoimmune responses. A concerning trend involves readily available, yet potentially inaccurate, “Dieta Dr. Gundry PDF gratis” resources. These free downloads may misidentify true “enemy” foods, leading to ineffective or even detrimental dietary changes.
Key lectin-containing foods to avoid include all nightshades (tomatoes, peppers, eggplant, potatoes), legumes (beans, lentils, peanuts), and grains (wheat, rice, corn). Furthermore, certain fruits like apples and some squashes are also flagged. Relying on unverified PDFs risks consuming these problematic foods, hindering the diet’s intended benefits. Always cross-reference information with Dr. Gundry’s official publications for accuracy and safety, avoiding potentially harmful shortcuts offered by free, unvetted materials.
Brown Foods: Identifying Lectin Concentrations
Dr. Gundry often uses the visual cue of “brown foods” as a quick guide to potential lectin concentrations, though it’s not a foolproof rule. Be wary of “Dieta Dr. Gundry PDF gratis” materials that oversimplify this concept, potentially leading to unnecessary restrictions or overlooking crucial nuances. While many brown foods – like wheat bran or brown rice – are high in lectins, the diet isn’t about eliminating all brown-colored items.
The principle highlights that the outer layers and seeds of plants often contain the highest lectin levels. Therefore, peeled fruits and vegetables, and avoiding seeds, are key. Relying solely on color from unofficial PDFs can be misleading; a comprehensive understanding of lectin content requires detailed knowledge, best sourced from Dr. Gundry’s official resources, not potentially inaccurate free downloads.
The Science Behind the Diet
Beware of “Dieta Dr. Gundry PDF gratis” resources; accurate understanding of gene function and hormonal impact requires verified information from credible sources.
How Genes Function in Relation to Diet
Dr. Gundry’s diet centers on the idea that our genes aren’t fixed destinies, but rather respond dynamically to nutritional input. He posits that certain foods, specifically those containing lectins, can “switch on” genes promoting inflammation and weight gain. Conversely, a carefully curated diet can “switch off” these detrimental genes and activate those supporting health and vitality.
Caution regarding “Dieta Dr. Gundry PDF gratis” materials is crucial. Understanding this complex interplay between genes and diet requires nuanced information. Free, unofficial PDFs may oversimplify or misrepresent Gundry’s concepts, potentially leading to ineffective or even harmful dietary choices. Accurate comprehension of how genes “function” and “control” bodily processes demands reliable sources, like Gundry’s published works.
Controlling Your Genes Through Nutrition
Dr. Gundry’s approach emphasizes that we aren’t victims of our genetic predispositions; instead, nutrition acts as a powerful epigenetic tool. By strategically eliminating lectin-rich “enemy” foods and embracing beneficial alternatives, individuals can influence gene expression, potentially mitigating risks for weight gain, inflammation, and chronic disease. This isn’t about altering the genetic code itself, but rather controlling how those genes are activated.
Be wary of a “Dieta Dr. Gundry PDF gratis”. Properly “controlling” genes through nutrition requires precise knowledge of lectin content and appropriate food substitutions. Inaccurate or incomplete information from unofficial sources could hinder progress and even exacerbate health issues. Prioritize verified resources to ensure effective epigenetic influence.
Hormonal Impact of the Gundry Diet
The Gundry diet profoundly impacts hormonal balance by reducing inflammation and optimizing gut health. Lectins, when unchecked, can disrupt the gut microbiome, leading to systemic inflammation that interferes with hormone production and signaling. Eliminating these compounds supports healthy cortisol levels, improves insulin sensitivity, and can positively influence sex hormones. This hormonal recalibration contributes to weight management, increased energy, and improved overall wellbeing.
Exercise caution with a “Dieta Dr. Gundry PDF gratis”. Hormonal responses are highly individual; A generalized, potentially inaccurate guide could lead to imbalances. Consulting Dr. Gundry’s official resources or a qualified healthcare professional is crucial for personalized hormonal optimization.

Practical Applications of the Diet
Beware of a “Dieta Dr. Gundry PDF gratis”; reliable implementation requires personalized guidance for cravings, fasting, and snacks to maximize benefits.
Managing Cravings on the Gundry Diet
Navigating cravings while adopting Dr. Gundry’s diet requires understanding their root cause. Be extremely cautious when searching for a “Dieta Dr. Gundry PDF gratis,” as these often lack the nuanced advice needed for success. Cravings frequently stem from lectin withdrawal or imbalances in gut bacteria. Prioritize healthy fats, like olive oil, and sufficient protein intake to promote satiety and stabilize blood sugar levels.
Occasional fasting, as suggested by Dr. Gundry, can also help reset cravings. Focus on incorporating beneficial foods that nourish your microbiome. Remember, a free PDF might not emphasize the importance of individualized adjustments based on your body’s unique response. Addressing hormonal influences and consistently choosing optimal food options are crucial for long-term craving management.
Occasional Fasting: A Supportive Practice
Dr. Gundry advocates for intermittent fasting as a complementary practice to his diet, but proceed with caution when relying on a “Dieta Dr. Gundry PDF gratis” for guidance. These free resources may oversimplify the process or lack personalized recommendations. Fasting can help improve insulin sensitivity, promote cellular repair, and support gut health – all key tenets of the Gundry approach.
Start with shorter fasting windows and gradually increase duration as tolerated. Ensure adequate hydration and nutrient intake during eating periods. Remember, fasting isn’t a one-size-fits-all solution; listen to your body. A comprehensive understanding, often missing from free PDFs, emphasizes the importance of combining fasting with a lectin-reduced diet for optimal results and sustained wellbeing.
Snack Options: Staying Satisfied
Navigating snack choices on the Gundry diet requires careful consideration, especially when relying on a “Dieta Dr. Gundry PDF gratis.” These often lack nuance regarding individual needs and potential sensitivities. Prioritize snacks rich in healthy fats and minimal lectins. Macadamia nuts, olives, and avocado are excellent choices, providing sustained energy and satiety.
Small portions are key to avoid triggering insulin spikes. Consider coconut yogurt (unsweetened) or a handful of pumpkin seeds. Beware of hidden lectins in seemingly healthy snacks. A legitimate resource, unlike many free PDFs, will emphasize reading labels diligently and focusing on whole, unprocessed foods to maintain stable blood sugar and support your dietary goals.
Health Benefits Associated with the Diet
Beware of “Dieta Dr. Gundry PDF gratis” claims of benefits; legitimate results require a properly implemented diet and personalized guidance for optimal wellbeing.
Weight Management and Fat Storage

The Gundry diet aims to influence weight management by minimizing lectin intake, potentially reducing inflammation and improving gut health – factors linked to fat storage. However, be cautious of “Dieta Dr. Gundry PDF gratis” resources promising rapid weight loss. These often lack nuance and may not reflect the diet’s comprehensive approach.
The diet’s focus on healthy fats, like olive oil, and protein sources can promote satiety, aiding in calorie control. Eliminating “enemy” foods, particularly those high in lectins, is believed to reduce digestive distress and optimize metabolic function. Remember, sustainable weight management requires a holistic lifestyle change, not just a restrictive diet downloaded from unverified sources. Prioritize official resources and professional guidance over potentially misleading free PDFs.
Antioxidant Intake and Cellular Health
Dr. Gundry’s diet emphasizes nutrient-dense foods, rich in antioxidants, to combat oxidative stress and promote cellular health. Prioritizing colorful fruits and vegetables (allowed within the diet’s parameters) supports the body’s natural defense mechanisms. Beware of “Dieta Dr. Gundry PDF gratis” materials that oversimplify this crucial aspect, potentially omitting vital food lists and preparation guidelines.
The diet’s focus on minimizing lectins is theorized to reduce inflammation, further protecting cells from damage. While antioxidants are vital, their bioavailability depends on proper digestion and absorption – areas the Gundry diet aims to optimize. Relying on unofficial PDFs risks receiving incomplete or inaccurate information regarding optimal antioxidant intake and cellular support. Always consult credible sources for comprehensive guidance.
Energy Levels and Overall Wellbeing
Proponents of Dr. Gundry’s diet report increased energy levels and improved overall wellbeing, attributing these benefits to reduced inflammation and optimized gut health. Eliminating lectin-containing foods is believed to alleviate digestive distress, allowing the body to focus energy on vital functions. However, seeking a “Dieta Dr. Gundry PDF gratis” can be misleading, as these often lack the nuanced details crucial for experiencing these positive effects.
The diet’s emphasis on healthy fats and protein provides sustained energy, unlike the spikes and crashes associated with high-carbohydrate diets. Be cautious of free PDFs that may offer generic advice, failing to address individual needs and potential sensitivities. A properly implemented Gundry diet, guided by reliable sources, aims to enhance vitality and promote long-term wellness.

Resources and Further Information
Beware of unofficial “Dieta Dr. Gundry PDF gratis” sources; prioritize Dr. Gundry’s official books like “The Plant Paradox” for accurate guidance.
“The Plant Paradox” and Related Books
Dr. Steven Gundry’s foundational work, “The Plant Paradox,” details the harmful effects of lectins found in many commonly consumed plants. This book is a cornerstone for understanding the diet’s principles. Be cautious searching for a “Dieta Dr. Gundry PDF gratis” of this title, as unauthorized versions may be incomplete or inaccurate.
Gundry’s subsequent book, “The Plant Paradox Solution,” offers a practical guide to implementing the diet, including recipes and meal plans. Further exploration can be found in “The Longevity Paradox,” focusing on harnessing the power of diet for extended healthspan. Always prioritize purchasing legitimate copies to ensure you receive the complete and verified information presented by Dr. Gundry himself, avoiding potentially misleading free downloads.
Finding a “Dieta Dr. Gundry PDF Gratis” (Cautionary Note)
The allure of a “Dieta Dr. Gundry PDF gratis” is understandable, but exercising extreme caution is crucial. Numerous websites offer free downloads, yet these often contain outdated, incomplete, or even deliberately misleading information. Such inaccuracies can compromise your health and hinder the diet’s effectiveness.
Prioritize official sources: Dr. Gundry’s books – “The Plant Paradox” and “The Plant Paradox Solution” – provide comprehensive guidance. Beware of sites promising a free PDF, as they may harbor malware or viruses. Investing in the official books ensures access to accurate, research-backed information, maximizing the benefits and minimizing risks associated with this dietary approach. Protect your wellbeing by avoiding unofficial downloads.