a million dreams sheet music pdf free
Discover the allure of “A Million Dreams” sheet music, a score that captivates musicians worldwide. This guide explores free PDF downloads, ensuring you access the full arrangement safely and legally for practice and performance. Enjoy thejourney!
What Is “A Million Dreams”?
“A Million Dreams” is a soaring ballad that first appeared in the 2017 film “The Greatest Showman.” Written by Benj Pasek and Justin Paul, the song captures the imagination of the protagonist, P.T. Barnum, as he envisions a world where everyone can live their dreams. Its lyrical narrative blends hopeful optimism with a gentle piano accompaniment, gradually building into a full orchestral climax. The piece is widely celebrated for its memorable hook, melodic structure, and emotional resonance, making it a favorite for vocalists and instrumentalists alike. In the context of sheet music, the arrangement typically includes vocal lines, piano, and optional orchestral parts, allowing performers to adapt the score to solo or ensemble settings. The song’s popularity has led to numerous covers, karaoke versions, and live performances, further cementing its status as modern musical classic. Whether you’re a beginner looking to practice expressive phrasing or an advancedmusician seeking to interpret its nuanced dynamics, “A Million Dreams” offers rich musical experience that challenges technical skill while rewarding emotional expression. Its universal theme of hope and possibility resonates across cultures, making it timeless addition to any repertoire!!!!
Why the Sheet Music Matters
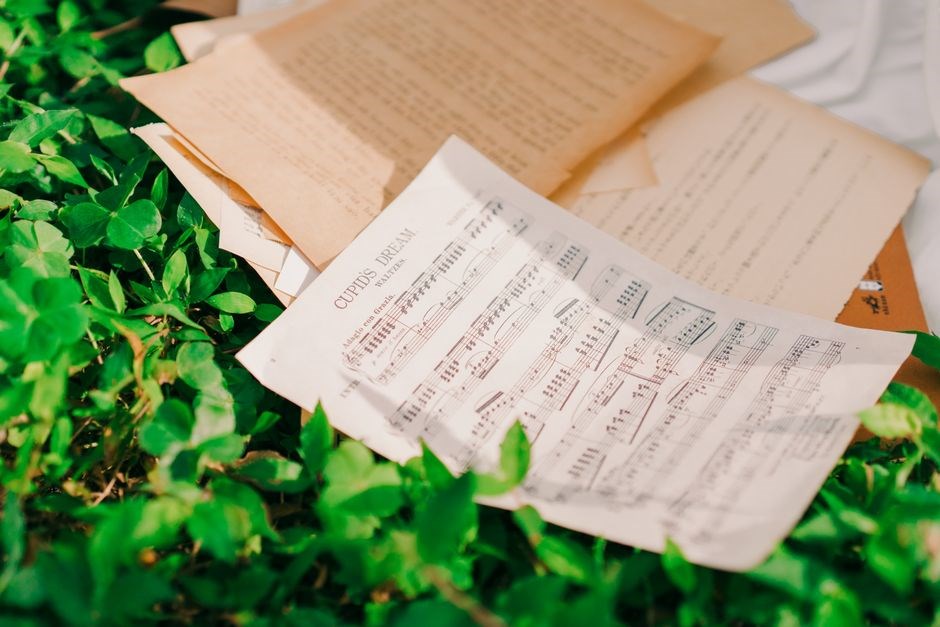
Sheet music is the bridge between composition and performance, offering a precise roadmap of melody, harmony, rhythm, and dynamics. For “A Million Dreams,” it reveals tempo shifts that mirror the narrative, harmonic progressions that underline emotional peaks, and rhythmic motifs that drive momentum. A free PDF lets singers and instrumentalists study the score deeply, experiment with phrasing, and rehearse without costly purchases. Digital format supports annotation, rehearsal planning, and sharing among ensemble members, fostering collaboration. Educators use it to illustrate musical form and voice leading, while students gain a tangible link to the creative process. By studying the score, performers can identify subtle dynamic markings, tempo rubato, and articulation cues that shape the emotional arc. The PDF format also allows for easy sharing with accompanists and conductors, ensuring everyone is aligned. The sheet music serves as a reference for transposition, arrangement, and improvisation, expanding the piece’s versatility across genres. Students can annotate fingering suggestions, rehearsal marks, and personal insights, turning the score into a living document that evolves with each practice session. Ultimately, sheet music turns a recorded performance into an interactive learning experience, encouraging musicians to engage with the material and bring their own artistic voice to the piece. This free PDF encourages musicians to explore expressive possibilities!!
Finding Free PDF Sheet Music
Explore trusted sites for free PDFs: official music libraries, public domain archives, and community forums. Use search filters, verify file integrity, and respect licensing. Download safely, then share responsibly with fellow musicians. Enjoy!!🎶
Official Sources
When searching for a free PDF of “A Million Dreams,” the first place to look is the official publisher’s website. Many composers and music houses offer a limited number of free scores for educational purposes. By visiting the publisher’s online portal, you can often find a downloadable PDF that is fully licensed for personal use. These files are typically high‑quality, with clear notation and accurate dynamics, making them ideal for both practice and performance. Additionally, official sources may provide supplementary materials such as chord charts, vocal arrangements, or instrumental parts, all of which can be accessed in a single, cohesive package. Another reliable option is the composer’s own website or the official fan club page. Artists sometimes release sheet music for promotional events or as part of a digital bundle. In these cases, the PDF is usually free or available at a nominal cost, and the download link is protected by a simple email verification to prevent unauthorized distribution. By subscribing to the composer’s mailing list, you can receive not only the sheet music but also updates on upcoming releases, rehearsal tips, and exclusive content. Check platforms that partner with publishers. All sources are free for personal use, ensuring no cost. all !!
Fan Communities and Forums

Dedicated fan forums and online communities are treasure troves for musicians seeking free PDF versions of popular songs. Sites such as MusicScribe, ScoreExchange, and SheetMusicPlus host user‑submitted arrangements, often shared under Creative Commons licenses or with explicit permission from the rights holder. Members frequently upload high‑resolution scans of official scores, annotated with personal insights, tempo markings, and performance tips. By joining these communities, you gain access to a library of shared resources, including rare transcriptions and instrumental adaptations that may not be available elsewhere. Many forums feature a “Downloads” section where verified users can exchange files securely. Moderators enforce copyright guidelines, ensuring that only legally permissible content circulates. Additionally, some fan groups organize live‑streamed practice sessions, where participants collaborate on interpreting the piece, offering real‑time feedback on dynamics and phrasing. Engaging with these communities also provides networking opportunities; you can connect with other musicians, share rehearsal recordings, and even collaborate on new arrangements. Remember to respect the community rules: always credit the original source, avoid distributing copyrighted material without permission, and use the PDFs solely for personal study or performance. By immersing yourself in these vibrant networks, you not only obtain free sheet music but also become part of a supportive, creative ecosystem that enriches your musical journey.
Community members often share insights on arrangement nuances, such as voicing choices, rhythmic alterations, and dynamic shaping. Many contributors provide annotated PDF files that highlight key sections, offer rehearsal tips, and suggest suitable accompaniment styles. By downloading and studying these resources, you can deepen your interpretive understanding and refine your performance technique. Additionally, the collaborative environment encourages feedback, allowing you to compare your playing with peers and receive constructive critiques that help you grow as a musician.
These PDFs unite, encouraging interpretations and growth together for all!
Legal Considerations
Before downloading, verify the song’s copyright status. If protected, only authorized PDFs are legal. Use reputable sites, respect licensing, avoid sharing or selling the file. Personal use is typically allowed fair use.
Copyright Status
“A Million Dreams” is a 2016 Disney song by Pasek & Paul. The sheet music remains under copyright, protected for 70 years from the authors’ death. Unauthorized PDFs on the internet violate U.S. law and the DMCA. Official arrangements are sold by licensed publishers, granting legal use for practice or performance. To stay compliant, obtain the score from the publisher’s website or a reputable digital platform. These sources provide the correct, rights‑managed PDF and may include performance licenses. If you find a free PDF, it is likely an unauthorized copy and its use can expose you to civil liability. Always verify the source before downloading.
Because the song is a recent composition, the copyright holder can enforce strict controls over its use. Musicians who wish to perform publicly must secure a license or obtain a performance rights organization (PRO) clearance. Many publishers offer sheet‑music bundles that include a performance license, simplifying the process. If you plan to record or distribute a rendition, mechanical synchronization licenses may be required. Therefore, while free PDFs may seem convenient, they often bypass legal safeguards and expose users to risk. Always use authorized sources to protect both your rights and the creators’ interests.
Fair Use and Personal Use
When you download a PDF of “A Million Dreams,” the only safe scenario is personal, non‑commercial use. The U.S. Copyright Act’s fair‑use doctrine allows limited copying for criticism, commentary, news reporting, teaching, scholarship, or research. However, the law weighs four factors: purpose, nature, amount, and effect on the market. A single page excerpt for a private study session typically satisfies the first three factors, but the fourth—whether the copy could replace the original—remains a gray area. Because the sheet music is a recent, commercially valuable product, courts often lean toward protection. If you plan to share the PDF on a forum, even anonymously, you risk infringing the publisher’s exclusive distribution rights. The safest approach is to purchase the official score or use a licensed platform that explicitly grants personal‑use licenses. This guarantees that your practice does not cross into the realm of public performance or distribution, where a separate license is mandatory. Always read the license terms carefully; many digital libraries include a “personal‑use only” clause that prohibits any form of redistribution. Remember that downloading music without permission is illegal and may lead to civil penalties.!!

Downloading and Using the PDF
Use secure sites, verify file integrity, open with trusted PDF readers, keep backups, and print with proper scaling. Remember to respect copyright, only for personal study, and never redistribute. Scan cleanly, annotate, and backup to cloud. now!!
Safe Download Practices
When downloading a free PDF, verify the source’s authenticity by checking the URL. Use a reliable antivirus program to scan the file before opening it. If the file is large, download during off‑peak hours to avoid bandwidth throttling. Store the PDF in a secure folder and back it up externally. When printing, preview the PDF to ensure correct page scaling, visible measures. Keep your OS and apps up to date, as patches close many vulnerabilities. When sharing the PDF with friends or classmates, do so via secure channels, such as encrypted email or a trusted cloud link, and never upload it to public forums. Finally, if you encounter any suspicious behavior—like unexpected pop‑ups, slow performance, or unauthorized access requests—close the PDF immediately, run a full system scan, and consult a professional if necessary.
To further safeguard your device, always download PDFs from sites that provide a checksum or hash value, and verify it against the file after download. If the checksum does not match, discard the file immediately. Consider using a sandbox or virtual machine to open unfamiliar PDFs, isolating any potential malware. Keep your operating system and all applications up to date, as patches close many vulnerabilities. Use a PDF viewer that blocks JavaScript by default !
Reading and Printing Tips
Before you start playing, open the PDF in a reliable viewer that supports zoom and page navigation. Adjust the zoom level so that the staff lines are crisp yet not pixelated; a 150‑200% zoom often works best for detailed scores. Use the “Fit to Width” option to keep the page layout consistent across devices. When printing, select the “Print as Image” setting if your printer has it, which preserves line integrity and prevents distortion. Choose a high‑resolution printer (at least 300 dpi) and use quality paper; a heavier stock reduces bleed‑through. If the PDF contains multiple parts, print each part on a separate sheet to avoid overcrowding. For rehearsal, fold the printed pages along the center fold line to create a booklet, allowing easy flipping. If you prefer digital practice, enable the “Page Turn” feature so you can navigate pages with a single click. Finally, keep a backup of the PDF on a USB drive or cloud storage so you always have a copy ready for future sessions or to share with fellow musicians.
Remember to annotate key changes and dynamic markings on the PDF editor, and consider converting it to a PDF‑X format to preserve fonts and layout across different operating systems. Boldly mark tempo changes now!!

Alternative Formats and Apps
Explore digital sheet music apps that offer scores, real‑time playback, and annotation tools. Many platforms let you import PDFs, convert them to edit formats, and sync across devices for on‑the‑go practice.!!
Digital Sheet Music Apps

Digital sheet‑music applications have revolutionized how performers access, annotate, and practice scores. With cloud‑based libraries, users can search for “A Million Dreams” and instantly download a high‑resolution PDF or a native format that supports playback, tempo adjustment, and looping. Many apps, such as MuseScore, forScore, and Newzik, offer cross‑platform syncing, allowing a musician to start a rehearsal on a tablet and finish on a laptop without losing progress. Interactive features—highlighting, note‑by‑note playback, and dynamic tempo changes—enable focused learning, while built‑in metronomes and recording tools help track improvement. Some platforms even integrate with MIDI controllers, letting you play along with the score in real time, which is especially useful for ensemble rehearsals. For educators, the ability to share annotated scores with students via email or a shared workspace streamlines lesson planning. Finally, most apps support export to PDF, ensuring that a musician can still print a clean, professional‑looking copy for stage use. Moreover, many apps offer cloud storage, letting musicians access scores from any device and collaborate in real time today. This flexibility is invaluable for remote rehearsals and online teaching!
Printable PDFs vs. Interactive Scores
When choosing how to study “A Million Dreams,” the format matters. A printable PDF offers a static, paper‑ready version that musicians can annotate with pencil, highlight passages, and staple into a portfolio. It is ideal for quick reference during live performances, where a physical score is often preferred. However, a PDF’s lack of playback and tempo control can slow learning, especially for complex passages. Interactive scores, on the other hand, bring the music to life. They allow you to hear the exact pitch, adjust tempo, loop sections, and even sync with a metronome or backing track. Many apps let you click on a note to hear it, which is invaluable for ear training and phrasing. Moreover, interactive scores can display dynamic markings in real time, helping you internalize crescendos and rubato. For ensemble settings, the ability to share a live score that updates instantly on each musician’s device, and reduce rehearsal time and errors. Ultimately, the choice depends on your practice style, performance context, and technical comfort. Combining both—using a PDF for stage use and an interactive version for rehearsal—often yields the best results. Practice regularly, share progress, and enjoy mastering this iconic piece!
and Resources
Final thoughts: free PDFs unlock practice, yet always check legality. Explore forums, libraries, and apps for diverse formats. Share progress, join communities, and keep dreaming. Happy playing! Remember to credit sources and enjoy the journey!
Further Reading
For musicians eager to deepen their understanding of “A Million Dreams” and its broader musical context, a curated list of books, articles, and online resources is invaluable. These materials cover everything from the song’s compositional structure and lyrical themes to the legal nuances of sheet‑music distribution. Below you’ll find a mix of scholarly texts, industry guides, and community‑driven blogs that will help you explore the piece from multiple angles. The Art of Film Scoring offers a comprehensive guide to translating cinematic narratives into music, while Copyright Law for Musicians explains the legal landscape surrounding free sheet‑music downloads and fair‑use policies. Digital Music Production covers tools and techniques for polished recordings, and The Musician’s Handbook provides practical tips on practice routines, sight‑reading, and performance preparation. Reputable music‑education blogs and YouTube channels frequently break down harmonic progressions, rhythmic patterns, and melodic phrasing, making the song accessible to players of all skill levels. Explore these resources to deepen your musical insight and playing!!! Discover how these resources can transform your practice routine and elevate your performance!!!…?
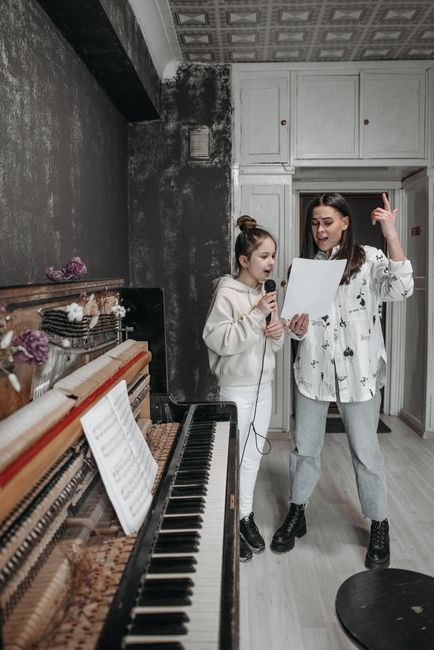
Where to Practice and Perform
After downloading the free PDF of “A Million Dreams,” choose a space that fits your style. Community centers, church halls, and local libraries often offer rehearsal rooms at low cost. Home studios can be set up with basic acoustic treatment—simple rugs, foam panels, and a decent microphone—to capture clean sound. If you prefer collaborative practice, online tools like Discord or Zoom let you rehearse with friends in real time while sharing the PDF layout. For public performances, open‑mic nights, talent shows, and community festivals provide supportive audiences. Churches and schools also host recitals that welcome volunteer performers, offering constructive feedback. Recording a performance and sharing it on social media or YouTube expands your reach and connects you with a global community of musicians. By exploring diverse practice venues and performance opportunities, you sharpen skills, build confidence, and share the magic of the song with others. If you’re new to sight‑reading, start with slower tempos and use a metronome to keep time. For ensemble rehearsals, consider using a digital score app that syncs with a shared timer, ensuring everyone stays in rhythm. After performances, review recordings to identify areas for improvement, and share them with peers for constructive critique. Remember to practice regularly and enjoy the creative process. Celebrate small milestones to keep motivation high daily every!